Buy Now →
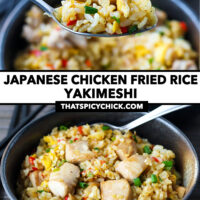
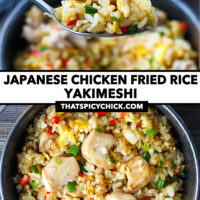
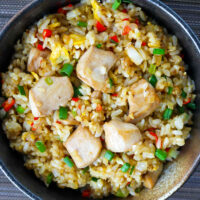
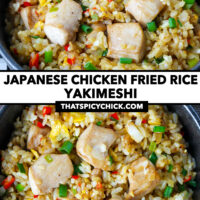
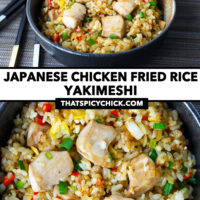
 Japanese Chicken Fried Rice (Yakimeshi)

Juicy chicken pieces, egg, spring onion, rice, pepper and a savory sauce come together to make this Japanese Chicken Fried Rice! Ready in under 30 minutes and perfect as a side or main dish!
- Prep Time: 10
- Cook Time: 15
- Total Time: 25 minutes
- Yield: 6 1x
- Category: Side
- Method: Stir-fry
- Cuisine: Japanese
Ingredients
Scale
For the Chicken Marinade:
- 250 grams / 9 ounces Chicken Thighs, boneless, skinless – trimmed, cleaned, cut into bite-sized pieces
- 2 TSP Low Sodium Light Soy Sauce
- ¼ TSP ground White Pepper
- 1/8 TSP Kosher Salt
- ¼ TSP Sesame Oil
For the Sauce:
- ½ + 1/8 TSP Kosher Salt (note 1), to taste
- ¼ TSP ground White Pepper
- 1/8 TSP ground Black Pepper (black pepper powder)
- 1.5 TBLS Low Sodium Light Soy Sauce
- 1 TSP Sesame Oil
- 1 TSP Pure Chili Oil (optional – without seeds/flakes – note 2)
For the Fried Rice:
- 3 Spring Onion (Scallion/Green Onion) – finely chopped, light green and white parts separated from dark green parts
- ½ small Yellow Onion – finely chopped
- 5 Garlic cloves – finely chopped
- 2-10 fresh Red Chilies (optional – Bird’s Eye or any other small hot red chilies – note 2), to taste – finely chopped
- 3 cups cooked Short-Grain White Rice (such as Japanese Koshihikari rice, 2 day old cold rice works best – note 3) – chilled
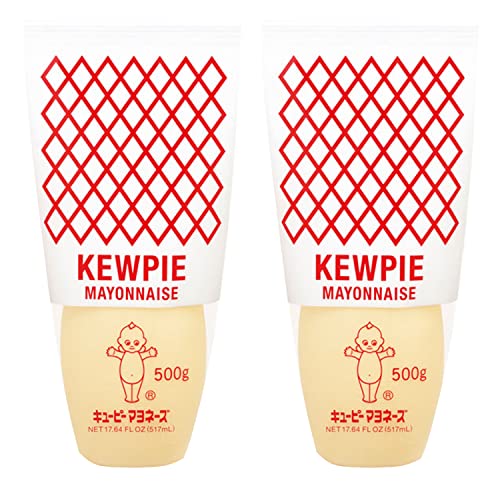
- 1 TBLS Japanese Kewpie Mayonnaise (note 4)
- 1 TSP Japanese Kewpie Mustard Mayonnaise (note 5 – or use more Kewpie Japanese Mayonnaise)
- 1.5 TBLS + 1 TSP Canola Oil (or other neutral flavored oil with a high smoke point)
- ½ TBLS Unsalted Butter
- 1 large Egg – lightly beaten
Instructions
Prep:
- Marinate the chicken: Trim off excess fat from the chicken thighs and cut into bite-sized pieces. Add the chicken to a medium bowl, followed by the low sodium light soy sauce, ground white pepper, kosher salt and sesame oil. Mix well to coat, then set aside.
- Make the sauce: Whisk together the kosher salt, ground white pepper, ground black pepper, low sodium light soy sauce, sesame oil and chili oil (if using) in a small measuring glass or bowl until combined well.
- Prepare the fresh ingredients. Chop the spring onion (separate the white and light green parts from the dark green parts), yellow onion, garlic, fresh red chilies (if using) as indicated in the ‘Ingredients’ section. Crack the egg into a small bowl and beat lightly.
- Mix the rice with the mayonnaises: In a large bowl or dish, mix the cooked rice with Kewpie mayonnaise and spicy mustard mayonnaise (if using) until mixed through and the grains are evenly coated and separated.
For the Japanese Chicken Fried Rice:
- Cook the chicken: Heat 1 tablespoon canola oil in a large wok (or a large deep edged frying pan/skillet) over high heat. Add the marinated chicken and allow to sear for 30 seconds, then stir-fry for 1 minute until just cooked through. Transfer to a fine mesh strainer held above the wok, allowing any excess oil to drip back in. Place the strainer with the chicken over a clean bowl and set aside.
- Stir-fry the onion and aromatics: Add ½ tablespoon unsalted butter and ½ tablespoon canola oil to the wok and heat over medium-high heat. Once hot (the butter doesn’t have to be entirely melted), add the yellow onion and spring onion white and light green parts. Stir-fry for 30 seconds until translucent. Add the garlic and chilies and stir-fry for 30 seconds to combine until fragrant.
- Add the rice: Add the mayonnaise coated rice and stir-fry for 30 seconds to combine.
- Cook the egg: Push everything to the side of the wok and add 1 teaspoon of canola oil (if needed). Pour the beaten egg in and allow to set for 20-30 seconds, then scramble and break into pieces. Toss to combine with everything.
- Add the chicken and sauce: Add the chicken and the juices in the bowl and pour the sauce over everything. Stir-fry for 1 minute, until everything is coated well in the sauce. Taste and adjust salt and pepper if needed.
- Toss through the spring onion: Toss through the spring onion dark green parts (reserve 1 tablespoon for garnish). Switch off the heat.
- To Serve: Transfer to a serving plate or divide evenly into bowls. Sprinkle with the reserved spring onion dark green parts. Serve immediately, as a side with other Asian main dishes, or as a main with pickled red ginger.

Notes
- Kosher Salt: Use half the amount if using iodized table salt.
- Fresh Red Chilies and Pure Chili Oil: It’s not typical for Japanese fried rice to be spicy, but I like the extra kick of heat from the chilies and pure chili oil (chili oil without any sediment). Omit both completely or use less for a milder fried rice.
- Cooked Short-Grain White Rice: Japanese fried rice is typically made with short-grain Japanese rice. It is stickier and glossier than long-grain rice and less dry than fried rice made with Thai Jasmine rice. Find it at an Asian or Japanese supermarket. Two-day old cold rice works best due to containing less moisture after being refrigerated than freshly cooked hot rice. However, even 1 day-old cold rice will work. Remove the rice from the fridge 20 minutes before you plan to cook so that it will be easier to mix with the mayonnaise and break apart in the wok.
- Japanese Kewpie Mayonnaise: Kewpie Japanese Mayonnaise is different from Western mayonnaise because it is made with egg yolks only (no whites). It is richer in flavor with a hint of tang on its own. However, the flavor is not distinguishable once the fried rice has been cooked. Its purpose is to create a thin coating of oil which separates the grains from each other. This in turn prevents the fried rice from becoming soggy or mushy. Find it in Japanese and Asian supermarkets, or order it online.
- Japanese Kewpie Mustard Mayonnaise: This is another Japanese mayonnaise by the Kewpie brand and it has a slightly spicy mustard flavor. It is not always easily available outside of Asia, but you can try finding it at a Japanese or Asian supermarket, or order it online. If unavailable, use more Kewpie mayonnaise in its place.
- See ‘Variations’ section in the post if you’d like to customize this fried rice.
Nutrition
- Serving Size: 1 bowl
- Calories: 312
- Sugar: 2.9g
- Sodium: 391.3mg
- Fat: 12.1g
- Saturated Fat: 2.3g
- Unsaturated Fat: 7.4g
- Trans Fat: 0g
- Carbohydrates: 36.1g
- Fiber: 1.1g
- Protein: 13.3g
- Cholesterol: 77.1mg