 Buy Now →
 Ninja Creami Apple Pie Protein Ice Cream

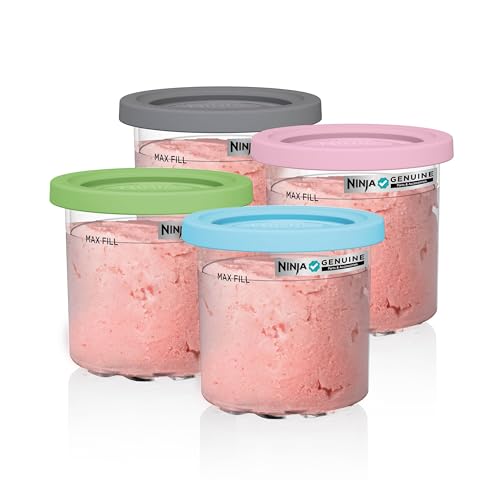
This Ninja Creami Apple Pie Protein Ice Cream is easy to make and has the flavors of a buttery slice of apple pie! With just 197 calories and 30 grams of protein for the entire pint, this is the perfect guilt-free treat for fall or when an ice cream craving hits!
- Prep Time: 10 Minutes
- Freezing Time: 24 Hours
- Cook Time: 0 Minutes
- Total Time: 24 hours 10 minutes
- Yield: 1 1x
- Category: Desserts
- Method: Freeze
- Cuisine: American
- Diet: Gluten Free
Ingredients
Scale
Ice Cream Base:
- 100ml / 3.5 fluid ounces Ultra-Filtered Low-Fat Milk (such as Fairlife 2% Milk – note 1)
- 250ml / 1 cup Unsweetened Vanilla Almond Milk (or any nut milk, plant-based milk or other milk of choice)
- 32 grams / 1 scoop PEScience Apple Pie Protein Powder (or vanilla protein powder – note 2)
- ¼ TSP Apple Pie Spice
- ¼ TSP Ground Cinnamon
- 32 grams / 2 TBSP + 2 TSP Brown Sugar Replacement, to taste (I used Swerve Brown Sugar – note 3)
- ⅛ TSP Guar Gum (note 4)
- ⅛ TSP Xanthan Gum (optional – note 4)
Optional Mix-ins/Toppings:
- 2 TBSP Granola, homemade or store-bought (I recommend my Maple Pecan Cinnamon Granola or Gingerbread granola)
- Cinnamon Spiced Diced Apples (note 5 for instructions on how to make)
- Crushed Lotus Biscoff Cookies
- Crushed Graham Crackers
Instructions
- Combine the ice cream base ingredients: Add the ultra-filtered low-fat milk, unsweetened vanilla almond milk, apple pie protein powder, apple pie spice, ground cinnamon, brown sugar replacement, guar gum and xanthan gum to the Ninja Creami pint. Use a handheld frother or handheld immersion blender to blend until evenly combined. (You can use a mini blender or food processor to blend the ingredients instead and pour into the pint container.)
- Freeze: Place the container in the freezer on a level surface and freeze for 24 hours or until frozen solid.
- Prepare for spinning: Remove the pint and set on the counter for 3-5 minutes. Run the bottom of the container under water from the sink for 15-30 seconds to help loosen up the icy edges from the sides of the container. Pat-dry, then take off the pint lid. Place it in the outer bowl and lock the lid.
- Spin: Turn on your Ninja Creami and install the outer bowl into the machine. Press the “Light Ice Cream” button for the first spin. The ice cream will come out looking crumbly, but that’s perfectly normal.
- Shave down ice walls: Eject the outer bowl. Run a butter knife around the edges of the container to help incorporate any icy parts into the ice cream. Cover and lock the lid. Reinstall into the machine and press the “Re-spin” button.
- Add mix-ins (optional – skip if adding toppings instead): Eject the outer bowl from the machine and remove the lid. If adding the granola or any other mix-ins of choice, make a hole in the middle of the pint (if one hasn’t formed already) using the butter knife and push it down. Cover and lock the lid. Reinstall into the machine run press the “Mix-In” cycle button.
- Enjoy! Remove the pint from the machine. Smooth the top with a spoon. Enjoy straight from the pint or scoop into serving dishes if you like. Top with granola or other desired toppings and enjoy!

Notes
- Ultra-Filtered Low-Fat Milk. I used Paul’s Hi-Calcium Low-Fat Milk which is an ultra-filtered milk available in Asia and Australia. If you’re in the USA or Canada, you can use Fairlife 2% milk or ultra-filtered milk from other brands such as Kroger CarbMaster, Organic Valley, Joyya, etc. If you live elsewhere, use any low-fat, semi-skimmed or regular whole milk.
- PEScience Apple Pie Protein Powder. A limited edition whey-casein protein powder that tastes like apple pie with a buttery crust and cinnamon and brown sugar spiced apples! Substitute with vanilla protein powder and add ½ teaspoon each ground cinnamon and apple pie spice and ¼ teaspoon butter extract to yield a similar flavor. See the ‘Variations’ section in the post above if you’d like to use an unflavored protein powder. See the ‘FAQs’ section if you prefer to use a protein shake instead.
- Brown Sugar Replacement. I used Swerve Brown Sugar which is made with erythritol, allulose and vegetable glycerin. Any sugar-free sweetener (stevia, monkfruit, allulose, etc.) or regular sweetener of your choice (light brown sugar, coconut sugar, granulated white sugar, etc.) can be used. Liquid sweeteners such as maple syrup, date syrup or agave nectar will also work. Adjust sweetener amount to taste.
- Guar gum and Xanthan Gum. Guar gum thickens the ice cream base and reduces the formation of ice crystals and helps create a scoopable ice cream texture. Xanthan gum serves a similar purpose. I find using both of these stabilizers together yields the best texture. However, this depends on the type of protein powder you use and what stabilizers are already incorporated in it. If you prefer not to use stabilizers in their natural form, you have two options:
- Use 1 tablespoon of vanilla flavored sugar-free instant jello pudding mix. It already has stabilizers/emulsifiers such as soy lecithin or xanthan gum in it. Keep in mind that pudding mix is already sweetened so you will likely need less sweetener.
- Use cottage cheese or cream cheese. Use low sodium or unsalted cottage cheese (½ cup – 110-115 grams depending on the brand) or cream cheese (2 tablespoons – 1 ounce/28 grams). Cream cheese usually already has guar gum in it. You won’t be able to taste the cottage cheese or cream cheese flavor but you’ll likely need to re-spin more than once as there will be slightly more ice crystal development.
- Cinnamon spiced diced apples. Make and cool completely before you process the ice cream. Dice 1 small apple into ½-1”cubes. Add to a skillet along with 1-½ tablespoons water. Cover and cook for 5 minutes, or until the apple cubes have softened and the water has been absorbed. Add 1 teaspoon of unsalted butter and sauté to coat. Cook for 5 minutes, stirring occasionally until the apples have completely softened. Add ¼ TSP cinnamon and sauté to combine. Transfer to a clean bowl and allow to cool completely before using as a topping or mix-in. Feel free to use olive oil if preferred instead.
- Make ahead. The ice cream base can be made and frozen up to 2-3 weeks in advance. However, the longer it is stored in the freezer the more ice crystals can form and the less sweet it will become over time.
- Storing and processing leftovers. After spinning, if you can’t finish the ice cream, level and smooth out the top with the back of a spoon. Cover and refreeze. It will freeze solid again. When ready to enjoy the leftovers, spin on “Light Ice Cream” again. DO NOT spin on the “Re-spin” function as the ice cream has frozen back into its original state. Using the “Re-spin” function when the mixture is solid can damage the machine and the paddle blade.
- Nutrition information. The nutritional information provided is an estimate for the ice cream base only. The information will vary with any ingredient substitutes and if adding any toppings or mix-ins.
- See the ‘Variations’ section in the post above for more tips on customizing this apple pie protein ice cream and ‘FAQs’ section for commonly asked questions.
Nutrition
- Serving Size: I pint
- Calories: 197
- Sugar: 6.1g
- Sodium: 454.8mg
- Fat: 5.3g
- Saturated Fat: 1.8g
- Unsaturated Fat: 3.4g
- Trans Fat: 0.1g
- Carbohydrates: 9.4g
- Fiber: 1.8g
- Protein: 29.8g
- Cholesterol: 51mg


