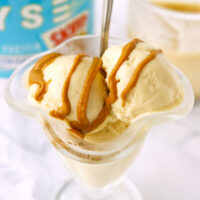
Ninja Creami Apple Pie Protein Ice Cream
This post contains affiliate links.
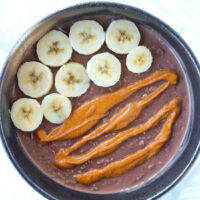
This Ninja Creami Apple Pie Protein Ice Cream is easy to make and has the flavors of a buttery slice of apple pie! It’s made with ultra-filtered milk, almond milk, protein powder, warming spices and topped with crunchy homemade granola! With just 197 calories and 30 grams of protein for the ice cream pint, this is the perfect guilt-free treat for fall or when an ice cream craving hits!

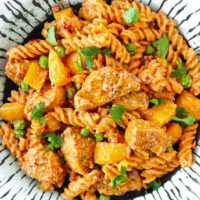
Looking for more high protein low calorie Ninja Creami protein ice cream recipes? Try my Pumpkin Pie Protein Ice Cream, this Peanut Butter Protein Ice Cream, or Cookies and Cream Protein Ice Cream next!
About this Recipe
Made in the Ninja Creami ice cream maker, this Apple Pie Protein Ice Cream is a feel-good dessert that is low calorie, high protein, low-fat, and low sugar!
It’s made with a combination of low-fat ultra-filtered milk and almond milk, apple pie protein powder, warming spices and topped with homemade granola to deliver that signature crunch from an apple pie crust!
If you don’t have apple pie protein powder, don’t worry! See my tips below on how to yield a similar flavor while using vanilla protein powder or a protein shake.
Using a combination of low-fat milk that is high in protein thanks to being ultra-filtered and unsweetened almond milk yields a creamy and thick ice cream texture. The apple pie protein powder also helps to thicken and flavor the ice cream with its buttery pie crust flavors and cinnamon and brown sugar notes!
It tastes rich and decadent like REAL ice cream but it’s a guilt-free treat that is packed with protein and will keep you full and satisfied for hours!
Thanks to the incredible technology of the Ninja Creami ice cream machine, this ice cream is ready in under 10 minutes! The hardest part is waiting for the ice cream mixture to freeze for 24 hours. However, it’s worth the wait since processing the ice cream in the Ninja Creami machine takes significantly less time than a conventional ice cream maker.
If it’s still warm where you are, this is a delicious and healthy treat to cool down. However, if you’re like me and can eat ice cream all year round, you’ll love this apple cinnamon flavored fall-themed treat on any given day!
Table of contents
Why This Recipe Works
- Easy to make. All you need to do to make this apple pie protein ice cream is blend the ingredients directly in the pint, freeze, process in the Ninja Creami machine and enjoy!
- High protein, low carb and low calorie. Using protein powder and ultra-filtered milk yields an ice cream that is high protein, low carb and low calorie! This makes it perfect for anyone following a low carb diet or lifestyle such as Keto, Paleo and Atkins.
- Customizable! You can add any of your favorite toppings and mix-ins and also adapt it for different dietary needs such as vegan or dairy-free!
- Eat it anytime. Enjoy it for dessert, a post-workout snack, or anytime of the day you need an ice cream fix!
- DELICIOUS apple pie flavor! If you’re an apple pie and ice cream lover, you’ll love the warming apple pie flavors in this guilt-free protein ice cream!

Ingredient Notes and Substitutes

- Ultra-Filtered Low-Fat Milk: I used Paul’s Hi-Calcium Low-Fat Milk which is an ultra-filtered milk available in Asia and Australia. Ultra-filtered milk is higher in protein than regular milk and has less calories, making it a great choice for healthy low calorie Ninja creami ice creams. Milk with a high protein content also results in a creamier and thicker ice cream consistency. Paul’s Hi-Calcium Low Fat Milk is a great alternative for those who don’t have access to Fairlife ultra-filtered milk, a popular milk choice for Ninja creami ice creams in the USA and Canada. If you’re in the USA or Canada, you can use Fairlife 2% milk or any ultra-filtered milk from other brands such as Kroger, CarbMaster, Organic Valley, Joyya, etc. Or if you live elsewhere, use any low-fat, semi-skimmed or regular whole milk.
- Unsweetened Vanilla Almond Milk: Using mostly unsweetened almond milk keeps this ice cream low in calories. Feel free to use any nut milk, plant-based milk or other milk of choice.
- PEScience Apple Pie Protein Powder: A limited edition whey-casein protein powder that tastes like apple pie with a buttery crust and cinnamon and brown sugar spiced apples! The protein powder will help flavor and thicken the ice cream. Substitute vanilla protein powder and add more cinnamon and apple pie spice if unavailable. (See the ‘Variations’ section below if you’d like to use an unflavored protein powder or a protein shake instead.)
- Ground Cinnamon: For additional warming cinnamon flavors!
- Apple Pie Spice: Use a store-bought or homemade apple pie spice blend. Pumpkin pie spice or more ground cinnamon can be substituted.
- Brown Sugar Replacement: I used Swerve Brown Sugar, a sugar-free and calorie-free sweetener made with erythritol, allulose and vegetable glycerin. Any sugar-free sweetener (stevia, monkfruit, allulose, etc.) or regular sweetener of your choice (light brown sugar, coconut sugar, granulated white sugar, etc.) can be used.
- Guar Gum: Thickens the ice cream base and reduces the formation of ice crystals. It also helps to create a scoopable ice cream texture.
- Xanthan Gum (optional): Serves a similar purpose as the guar gum. I find using both of these stabilizers together yields less icy and thicker Ninja creami ice creams. However, this depends on the type of protein powder you use and what stabilizers are already incorporated in it. I recommend omitting the xanthan gum if using a different brand of protein powder as too many stabilizers can result in a stringy or gummy texture. (See the ‘Variations’ section below if you prefer to make ice cream without xanthan gum or guar gum.)
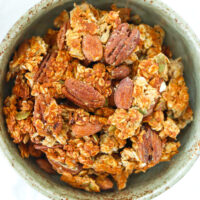
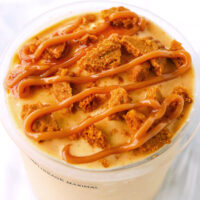
- Optional Toppings/Mix-ins: Top with homemade or store-bought granola. I highly recommend my Maple Pecan Cinnamon Granola or Gingerbread Granola! You can also top with buttery cinnamon spiced diced apples or use them as a mix-in. Crushed Lotus Biscoff cookies or graham crackers as a topping or mix-in would also be delicious! Or use any other ice cream toppings you love!
Full ingredient list and amounts are in the recipe card below.

Keep in Touch!
Subscribe to get new posts via email:
How to Make Apple Pie Protein Ice Cream
Below is a step-by-step overview on how to make this protein ice cream recipe. Keep scrolling down to get to the recipe card below with the full recipe and detailed instructions!


7. Add mix-ins (optional). Eject the outer bowl from the machine and remove the lid. If adding any mix-ins, make a hole in the middle of the pint (if one hasn’t formed already) using the butter knife and push down your mix-ins of choice. Cover and lock the lid. Reinstall into the machine run press the “Mix-In” cycle button.

Storing and Processing Leftovers
- Storing: If you can’t finish the ice cream, level and smooth out the top with the back of a spoon. Cover and refreeze. It will freeze solid again.
- Processing leftovers: When ready to enjoy the leftovers, spin on “Light ice cream” again. DO NOT spin on the “Re-spin” function as the ice cream has frozen back into its original state. Using the “Re-spin” function when the mixture is solid can damage the machine and the paddle blade.
Cook’s Tips
- Freeze without the lid on. Just for a couple of hours before placing the lid on. This will prevent a bump from developing at the top of the pint, which is known to cause the blade to move and the machine to break when processing the ice cream.
- Shave the bump with a vegetable peeler. Alternatively, you can freeze with the lid on and let the bump form. Just be sure to shave it off using a vegetable peeler before processing the ice cream.
- Freeze until solid for the best texture. Ninja recommends freezing for 24 hours before spinning your ice cream mixture. However, the time varies depending on how cold your freezer is and also the surrounding temperature/climate. The desired goal is for the ice cream mixture to freeze rock solid or be around -0°F (18°C) in order for the machine to process it properly. If the mixture is not frozen through completely, the ice cream will be very loose and like a thick milkshake after you spin it.
- Tips before you process the ice cream. Remove the pint and set on the counter for 3-5 minutes. Then run the bottom of the container under water from the sink for 15-30 seconds to help loosen up the icy edges from the sides of the container. Pat-dry, then proceed with processing the ice cream.
- For ice cream with a soft serve consistency. Spin 2 times on the “Re-spin” setting after the initial “Light Ice Cream” spin. However, be careful as the heat and friction caused by multiple rounds of the “Re-spin” cycle may make the texture too soft and melty and possibly stringy due to the stabilizers.
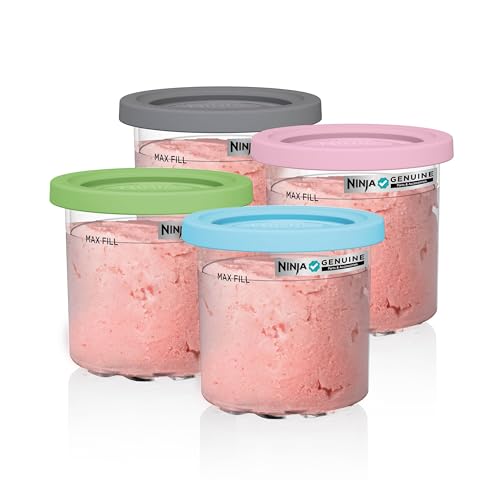
- Purchase extra creami pints. I recommend purchasing extra Ninja creami pints and batch prepping your creami ice creams. Making several pints and flavors at once saves time during the week. Plus, you’ll always have one ready to spin anytime you have an ice cream craving!

Variations
- Use vanilla protein powder. If using vanilla protein powder, add ½ teaspoon each ground cinnamon and apple pie spice and add ¼ teaspoon butter extract.
- Use unflavored protein powder. If using unflavored protein powder, add ½ teaspoon each ground cinnamon and apple pie spice, ¼ teaspoon butter extract and ½ teaspoon vanilla extract to flavor the ice cream base.
- Make it dairy-free. Use a plant-based protein powder, coconut milk or other nondairy milk instead of ultra-filtered low-fat milk.
- Use sugar-free instant jello pudding mix. An alternative to using guar gum and xanthan gum is adding 1 tablespoon of sugar-free vanilla flavored instant jello pudding mix. Instant pudding mix powder already has stabilizers or emulsifiers such as xanthan gum or soy lecithin in them. Keep in mind that they are already sweetened so you won’t need as much sweetener.
- Use cottage cheese or cream cheese. You can omit the xanthan gum and guar gum if doing so and the ice cream will still be creamy and not too icy! Use low sodium or unsalted cottage cheese (½ cup – 110-115 grams depending on the brand) or cream cheese (2 tablespoons – 1 ounce / 28 grams). Cream cheese usually already has guar gum in it. You won’t be able to taste the cottage cheese or cream cheese flavor but you’ll likely need to re-spin more than once as there will be slightly more ice crystal development.
- Use cinnamon spiced diced apples as a topping or mix-in. Make and cool completely before you process the ice cream. Dice 1 small apple into ½-1”cubes. Add to a skillet along with 1-½ tablespoons water. Cover and cook for 5 minutes, or until the apple cubes have softened and the water has been absorbed. Add 1 teaspoon of unsalted butter and sauté to coat. Cook for 5 minutes, stirring occasionally until the apples have completely softened. Add ¼ TSP cinnamon and sauté to combine. Transfer to a clean bowl and allow to cool completely before using as a topping or mix-in. Feel free to use olive oil if preferred instead.
FAQs
Yes. Many people use store-bought protein shakes to make Ninja creami ice creams and enjoy the flavor. I recommend trying a vanilla protein shake from Fairlife, Owyn or Premier brand as several people have noted there’s no artificial sweetener aftertaste with them. This is to be taken with a grain of salt as everyone has different taste buds.
If using a protein shake, omit the protein powder, both milks and xanthan gum. Add ½ teaspoon each ground cinnamon and apple pie spice, ¼ teaspoon butter extract, ¼ teaspoon guar gum and sweetener to taste to flavor the ice cream.
You’ll likely need less sweetener since protein shakes already have sweeteners incorporated in them. Depending on the shake, you may be able to omit the guar gum, especially if it contains carrageenan, another type of stabilizer that is extracted from seaweed and used to thicken foods.
If you prefer not to use a stabilizer in its raw form, add 2 tablespoons of cottage cheese, Greek yogurt, or cream cheese. Alternatively ½ tablespoon of sugar-free instant pudding powder can be used instead too.
The ice cream base can be made and frozen up to 2-3 weeks in advance. However, the longer it is stored in the freezer the more ice crystals can form and the less sweet it will become over time.
That said, I’ve prepped and frozen Ninja creami ice cream bases 2-3 months in advance and they still taste pretty great when processed. I recommend leaving out the ice cream on the counter for 5-15 minutes if it’s been frozen for a longer period. You want the temperature to come up slightly but not so much that it starts to defrost and melt. Then run the bottom of the container under water from the sink for 15-30 seconds and process as indicated.
The regular ice cream cycle is for high fat and high sugar ice cream bases and the blade will spin slower and for a shorter period – 2 minutes – than it would if using the “light ice cream” function.
Because this apple pie protein ice cream is both low in sugar and fat, it will freeze harder. The “light ice cream” cycle should be used as the blade spins faster and for a longer period – 4 minutes. It will adequately process the hard, frozen lite ice cream base to make it creamy.
If you process on the regular ice cream function for this ice cream, it’ll be icy and not completely creamy. You’ll end up having to do multiple rounds of the “re-spin” cycle, which will make the ice cream soft and melty.

MADE THIS RECIPE? Please leave a comment and a ⭐️⭐️⭐️⭐️⭐️ star rating below and let me know how you liked it! You can also take a photo and tag it with @thatspicychick on Instagram and hashtag it #thatspicychick. I love seeing your creations!
STAY CONNECTED! You can also follow me on Pinterest, Facebook or Instagram.
Sign up for my email list to get my latest recipe in your inbox weekly!
More Ninja Creami High Protein Ice Creams

Ninja Creami Apple Pie Protein Ice Cream

This Ninja Creami Apple Pie Protein Ice Cream is easy to make and has the flavors of a buttery slice of apple pie! With just 197 calories and 30 grams of protein for the entire pint, this is the perfect guilt-free treat for fall or when an ice cream craving hits!
- Prep Time: 10 Minutes
- Freezing Time: 24 Hours
- Cook Time: 0 Minutes
- Total Time: 24 hours 10 minutes
- Yield: 1 1x
- Category: Desserts
- Method: Freeze
- Cuisine: American
- Diet: Gluten Free
Ingredients
Ice Cream Base:
- 100ml / 3.5 fluid ounces Ultra-Filtered Low-Fat Milk (such as Fairlife 2% Milk – note 1)
- 250ml / 1 cup Unsweetened Vanilla Almond Milk (or any nut milk, plant-based milk or other milk of choice)
- 32 grams / 1 scoop PEScience Apple Pie Protein Powder (or vanilla protein powder – note 2)
- ¼ TSP Apple Pie Spice
- ¼ TSP Ground Cinnamon
- 32 grams / 2 TBSP + 2 TSP Brown Sugar Replacement, to taste (I used Swerve Brown Sugar – note 3)
- ⅛ TSP Guar Gum (note 4)
- ⅛ TSP Xanthan Gum (optional – note 4)
Optional Mix-ins/Toppings:
- 2 TBSP Granola, homemade or store-bought (I recommend my Maple Pecan Cinnamon Granola or Gingerbread granola)
- Cinnamon Spiced Diced Apples (note 5 for instructions on how to make)
- Crushed Lotus Biscoff Cookies
- Crushed Graham Crackers
Instructions
- Combine the ice cream base ingredients: Add the ultra-filtered low-fat milk, unsweetened vanilla almond milk, apple pie protein powder, apple pie spice, ground cinnamon, brown sugar replacement, guar gum and xanthan gum to the Ninja Creami pint. Use a handheld frother or handheld immersion blender to blend until evenly combined. (You can use a mini blender or food processor to blend the ingredients instead and pour into the pint container.)
- Freeze: Place the container in the freezer on a level surface and freeze for 24 hours or until frozen solid.
- Prepare for spinning: Remove the pint and set on the counter for 3-5 minutes. Run the bottom of the container under water from the sink for 15-30 seconds to help loosen up the icy edges from the sides of the container. Pat-dry, then take off the pint lid. Place it in the outer bowl and lock the lid.
- Spin: Turn on your Ninja Creami and install the outer bowl into the machine. Press the “Light Ice Cream” button for the first spin. The ice cream will come out looking crumbly, but that’s perfectly normal.
- Shave down ice walls: Eject the outer bowl. Run a butter knife around the edges of the container to help incorporate any icy parts into the ice cream. Cover and lock the lid. Reinstall into the machine and press the “Re-spin” button.
- Add mix-ins (optional – skip if adding toppings instead): Eject the outer bowl from the machine and remove the lid. If adding the granola or any other mix-ins of choice, make a hole in the middle of the pint (if one hasn’t formed already) using the butter knife and push it down. Cover and lock the lid. Reinstall into the machine run press the “Mix-In” cycle button.
- Enjoy! Remove the pint from the machine. Smooth the top with a spoon. Enjoy straight from the pint or scoop into serving dishes if you like. Top with granola or other desired toppings and enjoy!


Notes
- Ultra-Filtered Low-Fat Milk. I used Paul’s Hi-Calcium Low-Fat Milk which is an ultra-filtered milk available in Asia and Australia. If you’re in the USA or Canada, you can use Fairlife 2% milk or ultra-filtered milk from other brands such as Kroger CarbMaster, Organic Valley, Joyya, etc. If you live elsewhere, use any low-fat, semi-skimmed or regular whole milk.
- PEScience Apple Pie Protein Powder. A limited edition whey-casein protein powder that tastes like apple pie with a buttery crust and cinnamon and brown sugar spiced apples! Substitute with vanilla protein powder and add ½ teaspoon each ground cinnamon and apple pie spice and ¼ teaspoon butter extract to yield a similar flavor. See the ‘Variations’ section in the post above if you’d like to use an unflavored protein powder. See the ‘FAQs’ section if you prefer to use a protein shake instead.
- Brown Sugar Replacement. I used Swerve Brown Sugar which is made with erythritol, allulose and vegetable glycerin. Any sugar-free sweetener (stevia, monkfruit, allulose, etc.) or regular sweetener of your choice (light brown sugar, coconut sugar, granulated white sugar, etc.) can be used. Liquid sweeteners such as maple syrup, date syrup or agave nectar will also work. Adjust sweetener amount to taste.
- Guar gum and Xanthan Gum. Guar gum thickens the ice cream base and reduces the formation of ice crystals and helps create a scoopable ice cream texture. Xanthan gum serves a similar purpose. I find using both of these stabilizers together yields the best texture. However, this depends on the type of protein powder you use and what stabilizers are already incorporated in it. If you prefer not to use stabilizers in their natural form, you have two options:
- Use 1 tablespoon of vanilla flavored sugar-free instant jello pudding mix. It already has stabilizers/emulsifiers such as soy lecithin or xanthan gum in it. Keep in mind that pudding mix is already sweetened so you will likely need less sweetener.
- Use cottage cheese or cream cheese. Use low sodium or unsalted cottage cheese (½ cup – 110-115 grams depending on the brand) or cream cheese (2 tablespoons – 1 ounce/28 grams). Cream cheese usually already has guar gum in it. You won’t be able to taste the cottage cheese or cream cheese flavor but you’ll likely need to re-spin more than once as there will be slightly more ice crystal development.
- Cinnamon spiced diced apples. Make and cool completely before you process the ice cream. Dice 1 small apple into ½-1”cubes. Add to a skillet along with 1-½ tablespoons water. Cover and cook for 5 minutes, or until the apple cubes have softened and the water has been absorbed. Add 1 teaspoon of unsalted butter and sauté to coat. Cook for 5 minutes, stirring occasionally until the apples have completely softened. Add ¼ TSP cinnamon and sauté to combine. Transfer to a clean bowl and allow to cool completely before using as a topping or mix-in. Feel free to use olive oil if preferred instead.
- Make ahead. The ice cream base can be made and frozen up to 2-3 weeks in advance. However, the longer it is stored in the freezer the more ice crystals can form and the less sweet it will become over time.
- Storing and processing leftovers. After spinning, if you can’t finish the ice cream, level and smooth out the top with the back of a spoon. Cover and refreeze. It will freeze solid again. When ready to enjoy the leftovers, spin on “Light Ice Cream” again. DO NOT spin on the “Re-spin” function as the ice cream has frozen back into its original state. Using the “Re-spin” function when the mixture is solid can damage the machine and the paddle blade.
- Nutrition information. The nutritional information provided is an estimate for the ice cream base only. The information will vary with any ingredient substitutes and if adding any toppings or mix-ins.
- See the ‘Variations’ section in the post above for more tips on customizing this apple pie protein ice cream and ‘FAQs’ section for commonly asked questions.
Nutrition
- Serving Size: I pint
- Calories: 197
- Sugar: 6.1g
- Sodium: 454.8mg
- Fat: 5.3g
- Saturated Fat: 1.8g
- Unsaturated Fat: 3.4g
- Trans Fat: 0.1g
- Carbohydrates: 9.4g
- Fiber: 1.8g
- Protein: 29.8g
- Cholesterol: 51mg
This post may contain affiliate links. We are a part of the Amazon Services LLC Associates Program, an affiliate advertising program designed to provide a means for us to earn a small commission (at no extra cost to you) by linking to Amazon.com and affiliated sites. The nutritional information provided is approximate and can vary based on several factors. It should only be used as a general guideline. For more information, please see our Disclosure.