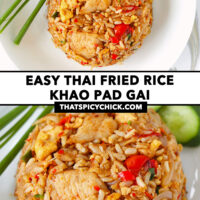
Thai Fried Rice (Khao Pad)
This post contains affiliate links.
Learn how to make Thai Fried Rice (Khao Pad) the authentic way like they do in Thailand and at Thai restaurants! It’s quick and easy to make in under 30 minutes, high in protein thanks to chicken and eggs, and full the BEST spicy, savory and sweet flavors! Perfect for busy weeknights and better than takeout!

One of my all-time favorite Thai dishes is Thai fried rice (also known as khao pad or khao phat).
What does Khao Pad mean?
‘Khao’ means “rice” and ‘pad’ or ‘phat’ means “stir-fried” in the Thai language. Essentially, this is a classic fried rice dish loved across the globe that’s made with simple ingredients like meat, rice, eggs, vegetables, and garlic. The irresistible sauce everything is lightly coated in features both salty and sweet flavors.
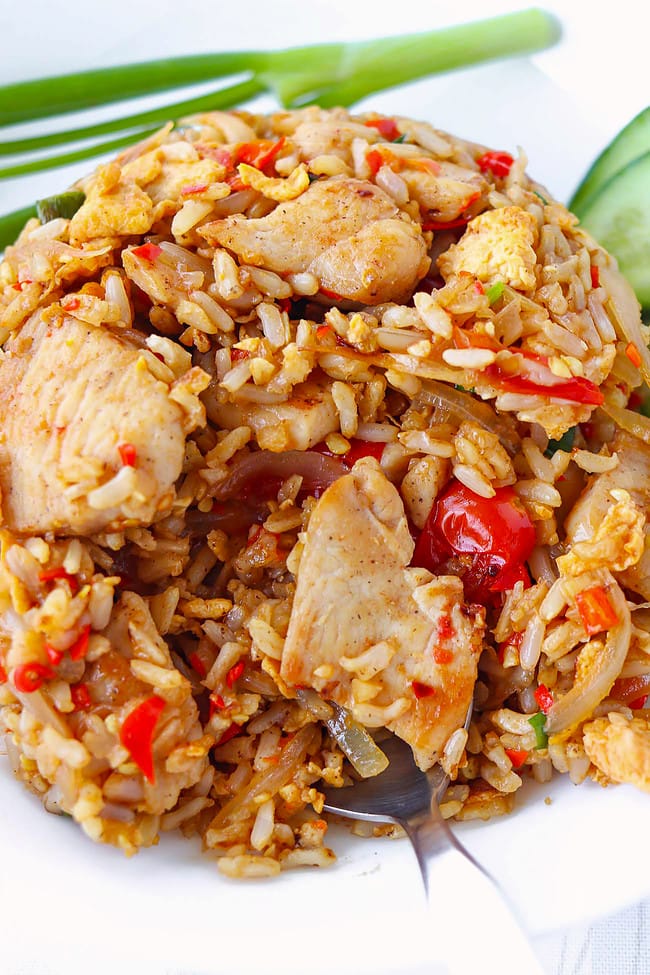
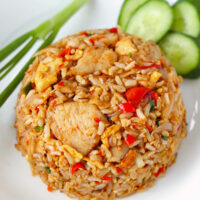
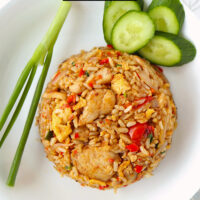
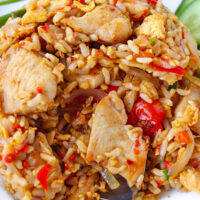
Here we have tender chicken pieces (‘gai’ in Thai), scrambled eggs, both yellow and green onions, plenty of fragrant garlic, fresh chilies, cherry tomatoes and jasmine rice tossed in a mouthwatering savory-sweet sauce. This is one satisfying and umami-loaded high protein fried rice!
It’s ready in under 30 minutes and perfect for busy weeknights. It’s also fantastic for meal prep and can be warmed up for an easy lunch or dinner during the week.
While I’ve used brown jasmine rice and less oil than typically used in Thai restaurants to make this khao pad gai healthier, it’s just as delicious with white jasmine rice, which can be used instead.
Feel free to make this with shrimp, pork, beef, tofu or any protein you love – they’ll all taste great in this classic Thai fried rice dish!

Why This Recipe Works
- Quick and easy to make. All you need is one wok or pan and it’s ready in under 30 minutes!
- High in protein. Chicken and eggs in Thai fried rice make this a high protein and filling meal.
- Less oily than restaurant fried rice. In spite of using less oil, this fried rice tastes delicious! Using just enough oil for the rice to fry ensures that you’ll have the perfect fried rice texture without packing on the calories.
- Customizable. You can customize it with your choice of protein (pork, chicken, shrimp, tofu, etc.) and add any fried rice friendly veggies you like!
- Adjustable spice level. Tailor it to your taste preference and add as many or as few chilies your heart desires!
- Better than takeout! It’s full of the best signature savory-sweet flavors in authentic Thai fried rice! It’s also cheaper to make at home and quicker to have ready on the table than it is to order takeaway and wait for the delivery guy to come!
Keep in Touch!
Subscribe to get new posts via email:
Ingredient Notes and Substitutes
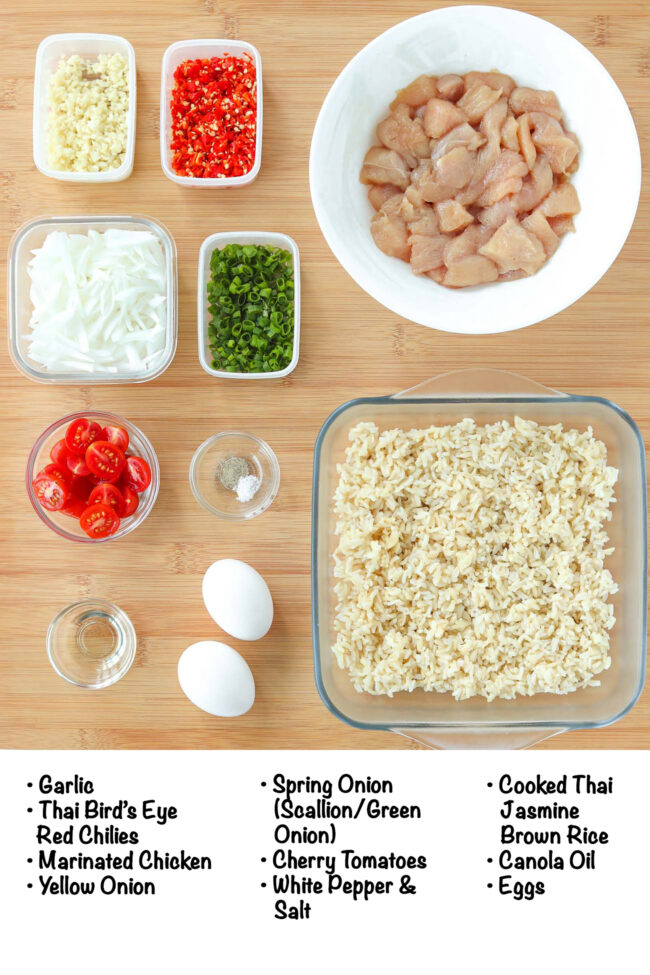
Here’s what you’ll need to make authentic Thai Fried Rice.
Chicken Marinade
- Chicken Breast: I used boneless and skinless chicken breasts. However, you can use boneless and skinless chicken thighs if preferred.
- Fine Sea Salt & Ground White Pepper: Ground white pepper is typically used over black pepper in Thai cuisine. However, black pepper will work in a pinch.
- Corn Starch: To help create a thin coating for the chicken. It’ll become a little crispy on the outside once cooked but stay tender and juicy on the inside.
- Fish Sauce: For seasoning the chicken but also to tenderize the meat.
- Light Soy Sauce: A Thai light soy sauce is preferred as it is less salty that Japanese or Chinese light soy sauce. However, any low sodium light soy sauce can be substituted.
- Canola Oil: Or use any neutral cooking oil with a high smoke point.
Thai Fried Rice
- Yellow Onion: The base of this Thai fried rice.
- Garlic: Use fresh whole cloves for the best flavor.
- Thai Bird’s Eye Red Chilies: These are known to be quite spicy and can pack a punch! They are available in Thai grocery stores, Asian supermarkets and some mainstream supermarkets depending on your location. Feel free to use any other hot red chilies that are easily available to you. Adjust the quantity to taste based on your heat level preference. Omit if you prefer to make this fried rice traditional and without the chilies.
- Spring Onion (Scallion/Green Onion): We’ll be frying off the white parts with the onion and using the dark green parts at the end as a finishing touch.
- Cherry Tomatoes: Traditional Thai fried rice typically includes sliced tomatoes. I prefer to use cherry tomatoes since only a small quantity is needed. You can use a sliced garden tomato, roma tomato or cherry tomatoes.
- Eggs: Lightly beaten in a bowl so we can scramble it to incorporate in the Thai fried rice.
- Cooked Thai Jasmine Brown Rice: I like to use jasmine brown rice but white jasmine rice can be used instead. Day-old chilled rice works best for making fried rice to prevent it from steaming.
Sauce
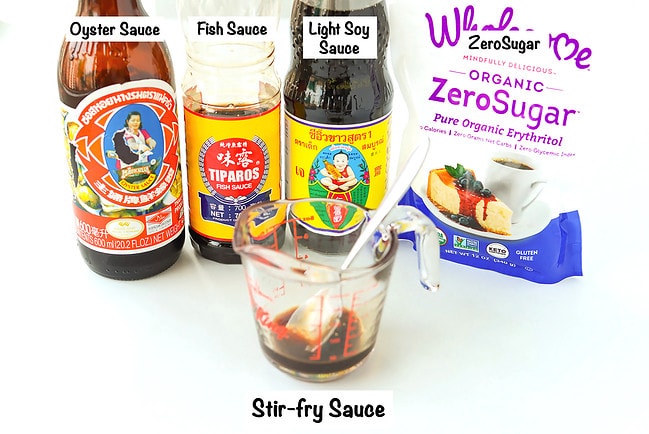
- Oyster Sauce: A thick sauce to provide both savory and sweet flavors. Contrary to popular belief, it doesn’t taste strongly of oysters!
- Light Soy Sauce: Most Thai restaurants and Thai people will use light soy sauce for Thai fried rice in their homes. However, Golden Mountain Seasoning Sauce is also used sometimes in its place. Any soy sauce, gluten-free soy sauce or tamari or golden mountain sauce will work.
- Fish Sauce: For more signature Thai savory flavors.
- Granulated Sugar-Free Sweetener: A little sugar is often used in Thai cuisine to balance out the spicy and salty flavors. I used Wholesome Zero Sugar which is a sugar-free and calorie-free erythritol based sweetener. Use any other sugar-free sweetener made from monk fruit, stevia, etc. Or you could use regular granulated white sugar or other sweetener of choice.
Full ingredient list and amounts are in the recipe card below.
How to Make Authentic Thai Fried Rice
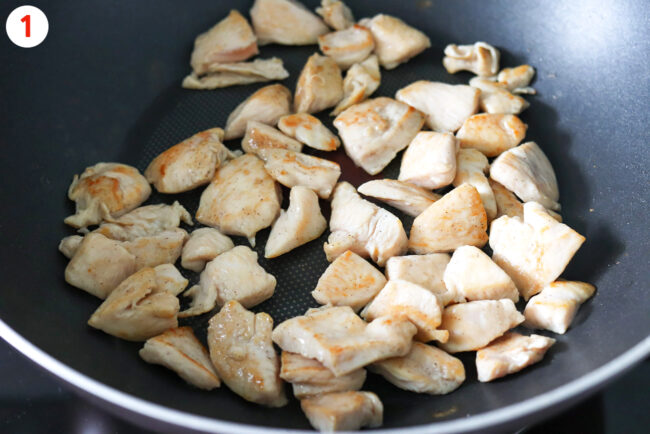
- Cook the chicken. Heat canola oil in a large nonstick wok or deep heavy bottomed skillet over high heat. Cook the chicken until slightly browned on the outside and just cooked in the center. Transfer to a clean bowl.
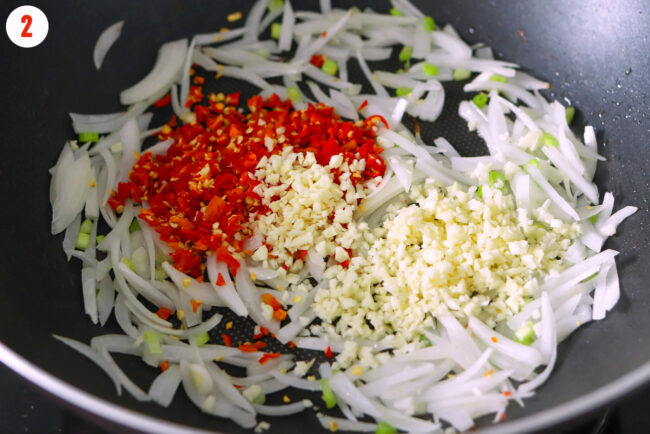
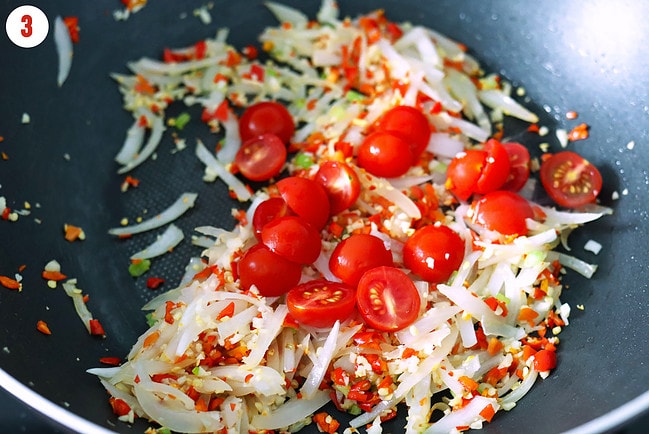
- Stir-fry the aromatics. Add more oil to the wok and heat over high heat. Stir-fry the yellow onion and spring onion white and light green parts until just starting to soften. Then add the garlic and chilies and stir-fry until fragrant.
- Toss through the cherry tomatoes. Just until combined.
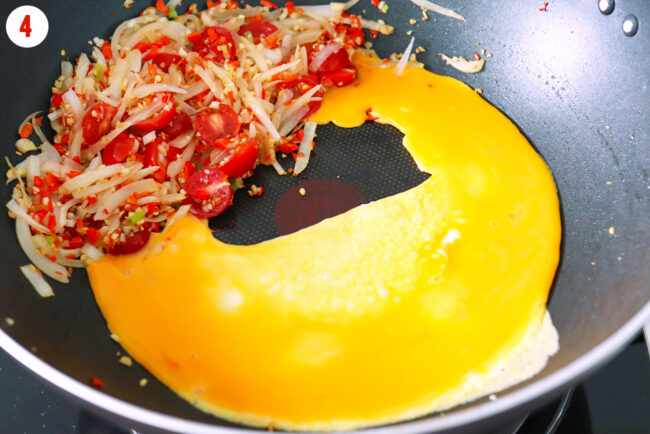
- Cook the eggs. Push everything to the side of the wok and pour in the lightly beaten eggs. Allow to set, then gently scramble and toss to combine with everything else.
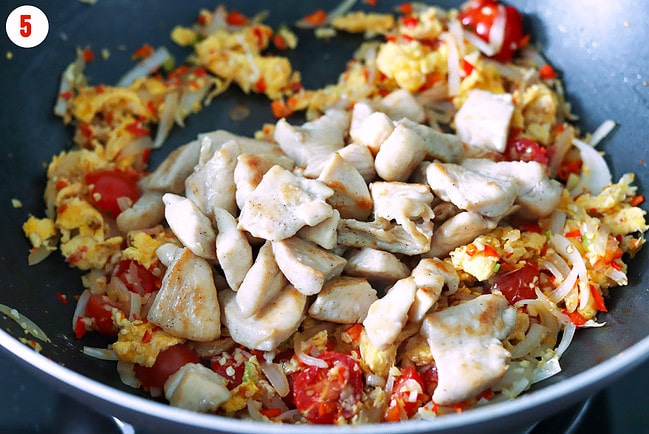
- Add the cooked chicken back into the wok. Stir-fry briefly to combine.
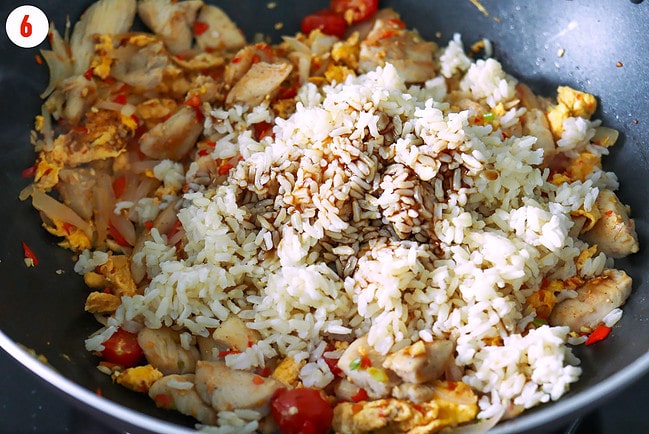
- Add the rice and sauce. Stir-fry and mix until everything is evenly coated in the sauce and the rice has heated through.
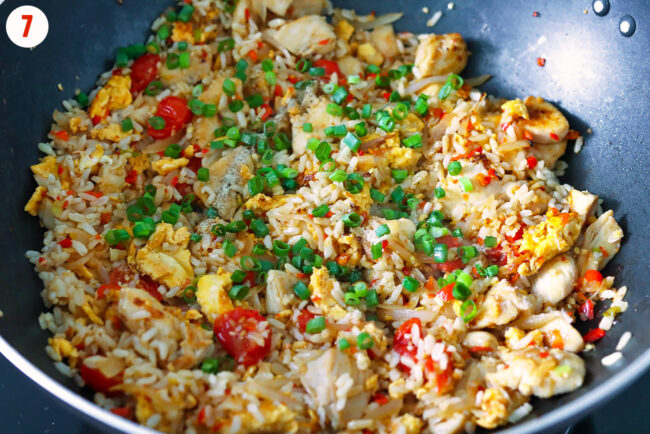
- Season and toss through the spring onion. Season with ground white pepper and fine sea salt to taste. Toss through the spring onion dark green parts and remove from the heat.
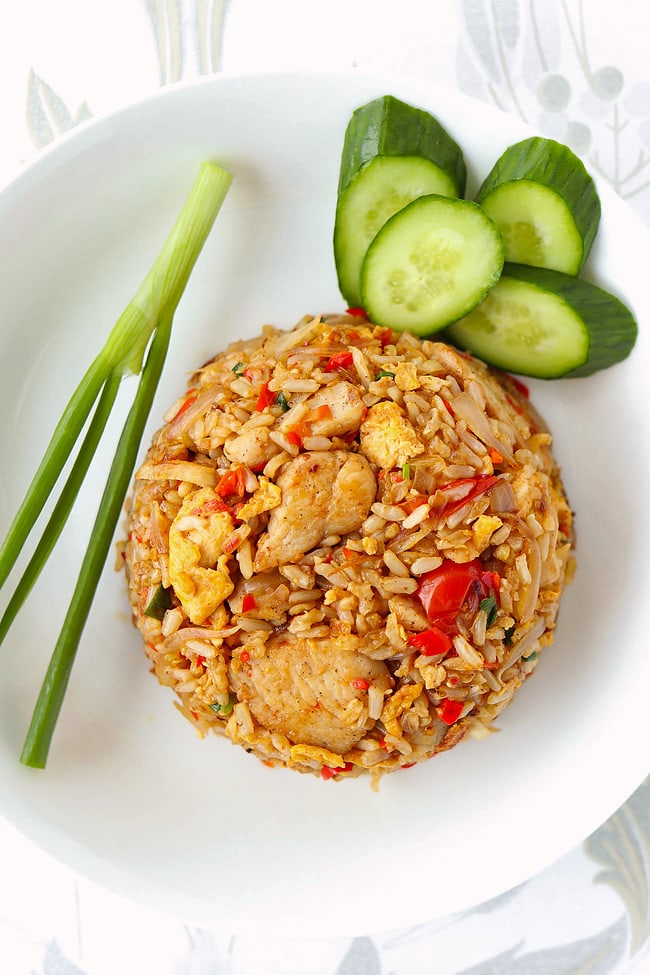
- Serve. Divide evenly onto plate or in bowls.
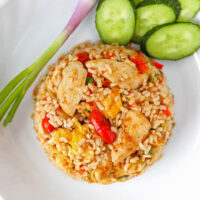
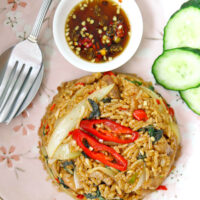
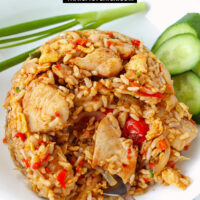
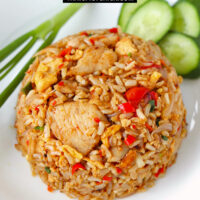
Alternatively, for fancier Thai restaurant style plating as shown, fill a bowl with the fried rice and flatten the top with the back of a spoon. Tip onto a plate and repeat for the remaining serving. Serve immediately with cucumber slices, a small spring onion stalk, and prik nam pla (chopped chilies in fish sauce) if desired.
Full detailed instructions are in the recipe card below.
Cook’s Tips
- Cook over high heat. High heat ensures that the rice grains separate and “fry” instead of steam and become too soft and mushy.
- Use day-old or two-day old rice. Cooked and chilled rice that’s one or two days old will have had time to lose some of its moisture in the fridge. By using cooked and chilled rice, the rice will fry perfectly in the wok as opposed to steam and become mushy.
- Mise en place. Have everything prepped before you switch on the stove as this fried rice cooks quickly and is ready in a matter of minutes!
- Open a window or exhaust fan. It can get quite smoky and pungent when stir-frying spicy chilies in a hot wok! Open a window or switch on the exhaust fan if needed.
- Meal prep option: Double the ingredients and cook in a large enough wok or pan that can handle all the ingredients without becoming overcrowded. If you don’t have a large enough wok or pan, cook in two batches. Divide into 4 meal prep containers and store in the fridge for 3-4 days. Reheat in the microwave and enjoy as an easy lunch or dinner during the week.
Variations
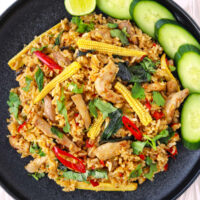
- Add veggies. Chopped Chinese broccoli (‘gai lan’), sliced green beans or frozen green garden peas (thaw them first!) can be added to boost the nutritional content and fiber.
- Make it vegetarian/vegan. Switch out the chicken out for crispy pan-fried tofu cubes, tempeh, or a plant-based chicken or other meat substitute. Use either a vegan fish sauce or more light soy sauce instead. Omit the egg as well to make it vegan.
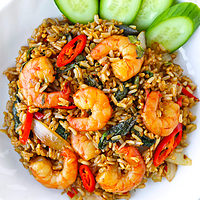
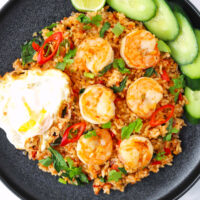
- Use a different protein. Shrimp/prawns, sliced pork fillet (tenderloin), beef flank or skirt steak will all taste great!
- Make it low carb. Instead of using rice, you can use shirataki rice which is made from konjac. Check out my Shirataki Thai Fried Rice if you prefer a lighter option that boasts the same delicious flavors of an authentic khao pad gai recipe!
Serving Suggestions
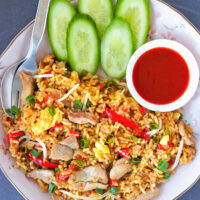
Khao Pad Gai is often served on its own with a side of cucumbers, a spring onion stalk and a lime wedge for squeezing. It’s also served with ‘prik nam pla’ which is chopped chilies in fish sauce.
With the addition of chicken, this recipe is a filling meal on its own. However, you can serve it with sides like:
If you’d like to make it a banquet style meal at home, serve with a lightened up Thai Green Curry Shrimp, Massaman Chicken Curry or Panang Chicken Curry for a truly hearty meal!
FAQs
Thai basil fried rice (Khao Pad Krapow) has holy basil leaves (also known as tulsi) tossed in at the end to give the fried rice a fragrant and peppery essence. Otherwise, they are similar in that they are both tossed with oyster sauce, light soy sauce and/or fish sauce for seasoning.
Thai jasmine white rice, also known as Thai Hom Mali rice, is typically used to make Thai fried rice. It is known for its subtle floral jasmine aroma.
Thai brown rice is more nutritious and has more fiber than milled jasmine rice because it still contains its bran and the germ. It also contains gamma oryzanol which is known to help decrease cholesterol. Several vitamins and antioxidants are still retained and they help support the nervous system.

MADE THIS RECIPE? Please leave a comment and a ⭐️⭐️⭐️⭐️⭐️ star rating below and let me know how you liked it! You can also take a photo and tag it with @thatspicychick on Instagram and hashtag it #thatspicychick. I love seeing your creations!
STAY CONNECTED! You can also follow me on Pinterest, Facebook or Instagram.
Sign up for my email list to get my latest recipe in your inbox weekly!
More Fried Rice from Thai Cuisine
Thai Fried Rice (Khao Pad)
Make Thai Fried Rice the authentic way like they do in Thailand and at Thai restaurants! It’s quick and easy to make in under 30 minutes with simple ingredients, high in protein and full the BEST spicy, savory and sweet flavors!
- Prep Time: 15
- Cook Time: 10
- Total Time: 25 minutes
- Yield: 2 1x
- Category: Dinner
- Method: Stir-fry
- Cuisine: Thai
Ingredients
For the Chicken:
- 300 grams / 10.58 ounces Chicken Breast, boneless, skinless – thinly sliced
- ¼ TSP Fine Sea Salt
- ¼ TSP ground White Pepper
- ½ TSP Corn Starch
- 1 TSP Fish Sauce
- 1 TSP Light Soy Sauce (preferably a Thai one, or use any low sodium light soy sauce)
- 1 TSP Canola Oil (or any neutral flavored cooking oil with a high smoke point)
For the Sauce:
- 1.5 TBLS Oyster Sauce
- 1 TSP Light Soy Sauce
- 1 TSP Fish Sauce
- ½ TSP granulated Sugar-Free Sweetener (I used Wholesome Zero Sugar – note 1)
For the Fried Rice:
- 100 grams / ½ small Yellow Onion – thinly sliced, then sliced into thirds
- 25 grams / 6-7 Garlic cloves – minced
- 35 grams / 9-10 fresh Red Chilies (Thai Bird’s Eye or any other small hot red chilies), to taste (note 2)* – destemmed, finely chopped
- 20 grams / 1 medium Spring Onion (Scallion/Green Onion) – chopped, white and light green parts separated from dark green parts
- 66 grams / about 6–8 small Cherry Tomatoes – halved
- 2 Eggs – lightly beaten
- ½ TBLS Canola Oil
- 240 grams / 1.5 cups cooked Thai Jasmine Brown Rice, day-old, chilled (100 grams / 3.5 ounces uncooked weight – note 3)
- ⅛ TSP ground White Pepper, to taste
- ⅛ TSP Fine Sea Salt, to taste
- To Serve (optional): Sliced cucumber, spring onion stalks, lime wedge for squeezing, ‘prik nam pla’ (chopped chilies mixed with fish sauce)
Instructions
Prep:
- Marinate the chicken: Cut the chicken into bite-sized pieces. Add to a medium bowl, followed by the fine seal salt, ground white pepper, corn starch, fish sauce and light soy sauce. Mix well to combine and set aside.
- Make the sauce: In a small measuring cup (for easier pouring) or a bowl, mix together the oyster sauce, light soy sauce, fish sauce and granulated sugar-free sweetener until thoroughly combined.
- Prepare the fresh ingredients: Chop/slice the yellow onion, garlic, red chilies, spring onion and cherry tomatoes as indicated in the ‘ingredients’ section. Crack the eggs into a small bowl and lightly beat.
For the Thai Fried Rice:
- Cook the chicken: Heat 1 teaspoon canola oil in a large nonstick wok or deep heavy bottomed skillet over high heat. Once hot, add the chicken and immediately spread the pieces out in the wok. Allow to sear for 40 seconds, then stir-fry for 1-2 minutes until the chicken is just cooked and slightly browned. Transfer to a clean bowl and set aside.
- Stir-fry the aromatics: Add the remaining ½ tablespoon of oil to the wok and heat over high heat. Add the yellow onion and spring onion white and light green parts. Stir-fry for 20 seconds until just starting to soften. Add the garlic and chilies and stir-fry for 30 seconds until fragrant. (Pro-tip: It can get quite smoky and pungent when stir-frying spicy chilies in a hot wok – open a window or switch on the exhaust fan if needed.)
- Add the cherry tomatoes: Add the cherry tomatoes and stir-fry to 10-15 seconds to combine.
- Cook the eggs: Push everything to the side of the wok and pour in the lightly beaten eggs. Allow to set for 15-20 seconds, then gently scramble and toss to combine with everything else.
- Add the chicken: Add the cooked chicken back into the wok and stir-fry briefly to combine.
- Add the rice and sauce: Add the rice and pour the sauce on top. Stir-fry for 1-2 minutes, until everything is evenly coated in the sauce.
- Season and toss through the spring onion: Season with ground white pepper and fine sea salt to taste. Toss through the spring onion dark green parts and switch off the heat.
- To Serve: Divide evenly onto plate or in bowls. Alternatively, for fancier Thai restaurant style plating, fill a bowl with the fried rice and flatten the top with the back of a spoon. Tip onto a plate and repeat for the remaining serving. Serve immediately with cucumber slices, a small spring onion stalk, and prik nam pla if desired.


Notes
- Fresh Red Chilies. Thai Bird’s Eye red chilies are known to be quite spicy. They are available in Thai grocery stores, Asian supermarkets and some mainstream supermarkets depending on your location. Feel free to use any other hot red chilies that are easily available to you. Adjust the quantity to taste based on your heat level preference. Omit if you prefer to make this fried rice traditional and without the chilies.
- Granulated Sugar-Free Sweetener. I used Wholesome Zero Sugar to balance out the savory and spicy flavors. It’s a sugar-free and calorie-free erythritol based sweetener. Use any other sugar-free sweeteners made from monk fruit, stevia, etc. Or you could use regular granulated white sugar or any other sweetener of choice.
- Thai Jasmine Brown Rice. Thai Jasmine rice is aromatic and traditionally used in Thailand for fried rice recipes. I prefer to use brown jasmine rice, but white jasmine rice or any any type of long grain white or brown rice you prefer will work.
- Meal prep option: Double the ingredients and cook in a large enough wok or pan that can handle all the ingredients without getting overcrowded. If you don’t have a large enough wok or pan, cook in two batches. Divide into 4 meal prep containers and store in the fridge for 3-4 days. Reheat in the microwave and enjoy as an easy lunch or dinner during the week.
- Storing and Reheating Leftovers. Leftovers will keep for 3-4 days in a sealed airtight container in the fridge. Reheat on high in the microwave for 1.5 to 2 minutes, stirring halfway, until hot throughout.
- See the ‘Variations’ section above if you’d like to customize this Thai fried rice recipe.
Nutrition
- Serving Size: 1/2 of recipe
- Calories: 551
- Sugar: 4.3g
- Sodium: 3341.8mg
- Fat: 16.3g
- Saturated Fat: 3.3g
- Unsaturated Fat: 9.9
- Trans Fat: 0.1g
- Carbohydrates: 59.1g
- Fiber: 5.5g
- Protein: 46.5g
- Cholesterol: 295.5mg
This post may contain affiliate links. We are a part of the Amazon Services LLC Associates Program, an affiliate advertising program designed to provide a means for us to earn a small commission (at no extra cost to you) by linking to Amazon.com and affiliated sites. The nutritional information provided is approximate and can vary based on several factors. It should only be used as a general guideline. For more information, please see our Disclosure.


One comment on “Thai Fried Rice (Khao Pad)”