The BEST Ninja Creami Coffee Protein Ice Cream
This post contains affiliate links.
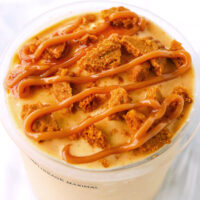
Ultra-creamy, decadent, and packed with 31 grams of protein, this Ninja Creami Coffee Protein Ice Cream is truly the BEST! It’s easy to make, full of bold and rich coffee flavors with caramelized undertones, and the perfect treat to satisfy your sweet tooth! Perfect for a hot summer day or when an ice cream craving hits!
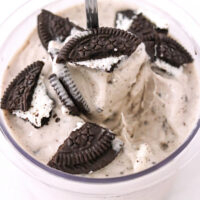
Looking for more high protein low-calorie Ninja Creami protein ice cream flavors? I think you’ll enjoy my Peanut Butter Protein Ice Cream, this Cookies and Cream Protein Ice Cream, or Pumpkin Pie Protein Ice Cream next!

Calling all my coffee lovers! This low-calorie healthy Ninja Creami Coffee Protein Ice Cream is delicious and absolutely delightful! It’s full of bold and rich coffee flavors, sweet caramel notes and has the BEST creamy texture!
I previously thought that my Ninja Creami Peanut Butter Protein Ice Cream was my favorite. Now, this dreamy, decadent and velvety coffee ice cream is giving the peanut butter ice cream some serious competition!
The first time I made this, I thought it tasted like Häagen-Dazs’ coffee ice cream. The second time, I thought it tasted EVEN BETTER than Häagen-Dazs’ coffee ice cream!
About This Recipe
This protein-packed Ninja Creami coffee ice cream recipe is made with simple ingredients and calls for just a little bit of preparation. It has just 205 calories for the entire pint and 31 grams of protein!
Plus, it’s low in sugar (free of added sugars), low-fat, healthy and still tastes like the BEST homemade coffee ice cream dessert you’ve ever had!
I love it as a post workout snack to kickstart the muscle recovery process. It’s also great for when I need a mid-day pick-me-up. If I’m having it close to bedtime, I simply make a decaf version and still get my yummy creami fix!
If you don’t have a Ninja Creami ice cream maker yet, I highly recommend it! It’s easy to use and great for making low-calorie healthy ice creams or any type of homemade ice cream recipe. I currently use mine 6 out of 7 nights a week and miss it when I’m traveling!
Table of contents
Why This Recipe Works
- Easy to make. All you need to do to make this coffee protein ice cream is blend the ingredients directly in the pint, freeze, process in the Ninja Creami ice cream machine and enjoy!
- No egg yolks, no sugar and quick to process. There are no egg yolks or sugar in this recipe. Nor is a lengthy churning time required thanks to the amazing technology of the Ninja Creami machine!
- High protein, low-carb and low calorie. Using protein powder creates a high protein, low-carb and low calorie ice cream. This healthy coffee ice cream is perfect for anyone counting macros, following a low-carb diet such as keto, or simply trying to eat more protein.
- Customizable! Add any of your favorite mix-ins and toppings! You can also adapt it for different dietary needs such as dairy-free or vegan, make a decaf version, or extra strong coffee flavored if you need an extra caffeine kick!
- DELICIOUS coffee flavor! If you’re a coffee-flavored ice cream lover, you’ll love the exquisite, rich and bold coffee flavors with sweet caramel brown sugar notes in this guilt-free protein ice cream!
Ingredient Notes and Substitutes

- Ultra-Filtered Low-Fat Milk: I used Paul’s Hi-Calcium Low-Fat Milk, an ultra-filtered long life Australian milk available in some parts of Asia. Ultra-filtered milk is higher in protein than regular milk and has less calories, which makes it a great choice for healthy low calorie Ninja creami lite ice creams. Milk with a higher protein content also results in a creamier and thicker ice cream consistency. If you’re in the USA or Canada, you can use Fairlife 2% milk or any low-fat ultra-filtered milk from other brands such as Kroger, CarbMaster, Organic Valley, Joyya, etc. If you live elsewhere, use any low-fat, 2% milk (semi-skimmed milk) or regular whole milk.
- Unsweetened Almond Milk: I like unsweetened vanilla almond milk but regular unsweetened almond milk works too. Alternatively, use any nut milk, plant-based milk, or other milk of choice. Using almond milk in combination with ultra-filtered milk as opposed to whole milk or heavy cream keeps the calories low while still yielding a creamy textured coffee ice cream.
- Rule 1 Lightly Salted Caramel Protein Powder. I used Rule 1 brand R1 Lightly Salted Caramel whey protein powder blend. The protein powder gives the coffee ice cream caramelized sweet notes and thickens it. See ‘Variations’ section below for protein powder flavor options.
- Guar Gum: Thickens the ice cream base and reduces the formation of ice crystals. It also helps in creating a scoopable firmer ice cream texture.
- Instant Espresso Powder: I used Vietnamese instant espresso powder made from pure Arabica coffee beans by Trung Nguyên brand. Their G7 espresso powder has a rich and bold coffee flavor that I absolutely adore. I recommend using any strong instant espresso powder or strong coffee powder that you love the flavor of. Note that the intensity of the coffee flavor decreases once frozen so using something with a strong coffee flavor is best.
- Xanthan Gum (optional): Serves a similar purpose to guar gum. I find using both guar and xanthan gum results in less icy and thicker Ninja creami ice creams. However, this depends on the type of protein powder (whey, whey-casein blend, pure casein, or plant-based) you use and what stabilizers are already incorporated in it. If using pure casein protein powder, I recommend omitting the xanthan gum as casein protein yields thick and creamy ice creams. See the ‘Variations’ section below if you want to make ice cream without xanthan gum or guar gum.
- Brown Sugar Replacement: I used Swerve Brown Sugar which is made from erythritol and allulose. You can use a white sugar replacement but the coffee ice cream will have less caramelized notes. Feel free to use regular light brown sugar, granulated white sugar or any other sugar-free or regular sweetener of choice. Natural sweeteners like maple syrup, date syrup, agave nectar can also be used.
- Optional Mix-ins: Feel free to add chocolate chips or chocolate chunks, chopped protein bars, any type of nuts you love (pistachios, hazelnuts, or glazed or candied pecans), broken up cookie pieces, etc.
- Optional Toppings: Top off your coffee cream with hot fudge sauce, salted caramel sauce, a drizzle of chocolate sundae syrup (I like Smucker’s sugar-free version), caramel sundae syrup, a swirl of natural peanut butter, whipped cream, berries or any other ice cream toppings you love! I’m a huge fan of topping off my creamis with Traders Joe’s Hold the Cone Tips filled with dark chocolate!
Full ingredient amounts are in the recipe card below.

Keep in Touch!
Subscribe to get new posts via email:
How to Make Coffee Protein Ice Cream in the Ninja Creami Ice Cream Maker
Below is a visual overview on how to make this recipe. The full recipe with detailed instructions can be found in the printable recipe card below.


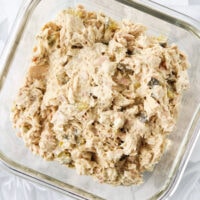
The ice cream will come out looking crumbly, powdery and only partially creamy. This is perfectly normal.

7. Add mix-ins (optional). Eject the outer bowl from the machine and remove the lid. If adding any mix-ins, make a hole in the middle of the pint using the butter knife and push your mix-ins of choice all the way down. Cover and lock the outer bowl lid. Reinstall into the machine press the “Mix-In” cycle button.


Cook’s Tips
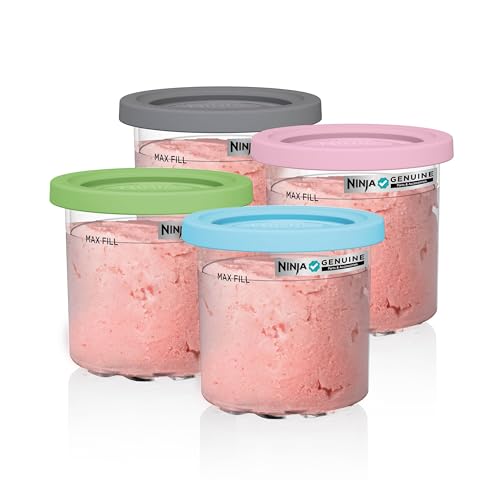
- Don’t go over the max fill line. During processing, the ice cream mixture expands and can overflow. Fill ingredients just below or up until the max fill line on the pint to avoid having to clean up a sticky mess!
- Ninja Creami Deluxe. Multiply the ingredient amounts by 1.5 if you have a Ninja Creami Deluxe machine.
- Freeze until solid for the best texture. While Ninja recommends freezing for 24 hours before spinning your ice cream mixture, you can get away with a shorter freezing time. For example, if your freezer is set at a very cold temperature, the mixture will freeze solid quicker. I also find that ambient temperature plays a factor as my creamis take about 18-20 hours to freeze solid in the winter. The goal is for the ice cream mixture to freeze rock solid or be around 0°F (-18°C) in order for the machine to process it properly. If the mixture is not frozen through completely, the ice cream will be very loose and more like a thick milkshake after you spin it.
- Tips before you process the ice cream. Remove the pint from the freezer and set it on the counter for 3-5 minutes to soften a little. It’ll need to sit for less time on the counter in hotter weather than colder weather. Just don’t let it sit out too long as it may become like a soft serve ice cream when you process it. Run the bottom of the container under hot water from the sink for 30 seconds to help loosen up the icy edges from the sides of the container. Pat-dry, then proceed with spinning the ice cream.
- For coffee soft serve. For ice cream with a soft serve consistency, spin 2 times on the “Re-spin” setting after the initial “Light Ice Cream” spin. However, be careful as the heat and friction caused by multiple rounds of the “Re-spin” cycle may make the texture too soft and melty and possibly stringy due to the stabilizers.
- Use decaf coffee. If you’ll be enjoying your coffee ice cream later in the day, use decaf coffee powder or decaf instant espresso powder.
- Purchase extra creami pints. I recommend purchasing extra Ninja creami pints and batch prepping your creami ice creams. Making several pints and flavors at once saves time during the week. Plus, you’ll always have a pint of ice cream ready to spin on a moment’s notice when a craving hits!

Variations
- Make the coffee flavor stronger. Use 1.5 to 2 teaspoons of instant espresso powder or extra strong instant coffee powder.
- Use unflavored or vanilla protein powder. If using unflavored protein powder, add 1 teaspoon vanilla bean paste or vanilla extract and additional sweetener to taste.
- Add cocoa powder. To make a mocha espresso ice cream, add 2 tablespoons of unsweetened cocoa powder. I recommend Dutch processed cocoa powder as it has a richer chocolate flavor than regular unsweetened cocoa powder. My personal favorite Dutch process cocoa brand is NuNaturals.
- Make it dairy-free. Use unsweetened or canned coconut milk instead of ultra-filtered low-fat milk. If keeping the calories low is not an issue, unsweetened coconut cream or sweetened condensed coconut milk can be used. Or try other plant-based alternatives for milk such as soy milk (increases protein content), cashew milk, macadamia milk, etc. Also, use a plant-based protein powder. I recommend almond protein, faba bean protein or pea protein powder if using a vegan protein powder.
- Use sugar-free instant pudding mix. An alternative to using guar gum and xanthan gum is adding 1 tablespoon of sugar-free vanilla flavored instant pudding mix. Instant pudding mix powder already has stabilizers or emulsifiers such as xanthan gum or soy lecithin incorporated. It is also already sweetened so you won’t need as much sweetener.
- Use cottage cheese or cream cheese. Omit the xanthan gum and use less guar gum if doing so. The ice cream will still be creamy and not too icy! Use ½ cup (80-90 grams depending on the brand) low sodium or unsalted cottage cheese or regular or light cream cheese (1 ounce / 28 grams). You shouldn’t be able to taste it as the flavor will be masked by the other ingredients and the strong coffee flavor.
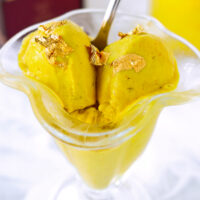
- Add Greek yogurt or protein yogurt. For a creamier texture, add 2-3 tablespoons of plain Greek yogurt or other thick yogurt. I find that adding some thick 4% fat Greek style yogurt to my Ninja Creami Golden Milk Ice Cream makes it lusciously creamy. You can also try adding plain or vanilla protein yogurt. If adding any yogurt, omit the xanthan gum and use less guar gum.
- Use a different sugar-free sweetener. Try monk fruit sweetener such as Lakanto Golden or Classic sweetener, stevia, allulose, etc.

FAQs
Many people use store-bought protein shakes to make Ninja creami ice creams and like the flavor! Try a vanilla protein shake from Fairlife or caffe latte flavor from Premier brand. If using a protein shake, you can leave out the protein powder, milk and xanthan gum. If using a coffee flavored protein shake, leave out the espresso powder or use less. I recommend adding the guar gum but you can use less as protein shakes already have stabilizers in them. Since protein shakes come in varying levels of sweetness, adjust the sweetener amount to taste as you may need less.
Espresso powder is better than espresso in liquid form as the water in the latter could cause increased formation of ice crystals.
Make the coffee protein ice cream recipe as indicated. Add 1-½ cups / 225 grams coffee protein ice cream, ½ cup / 118ml whole milk (or milk of choice) to an empty creami tub. Place the tub in the outer bowl and lock the lid. Process on the “Milkshake” cycle. Once the cycle is complete, feel free to add any mix-ins of choice and process on the “Mix-in” cycle. Pour into a tall glass and enjoy!
If you can’t finish the ice cream, level and smooth out the top with the back of a spoon. Cover and place it back in your freezer. It will freeze solid again. When you are ready to enjoy the leftovers, spin on “Light Ice Cream” again. DO NOT spin on the “Re-spin” cycle as the ice cream has frozen back into its original state. Using the “Re-spin” function when the mixture is solid can damage the machine and the paddle blade.

MADE THIS RECIPE? Please leave a comment and a ⭐️⭐️⭐️⭐️⭐️ star rating below and let me know how you liked it! You can also take a photo and tag it with @thatspicychick on Instagram and hashtag it #thatspicychick. I love seeing your creations!
STAY CONNECTED! You can also follow me on Pinterest, Facebook or Instagram.
Sign up for my email list to get my latest recipe in your inbox weekly!
More ninja Creami Protein Ice Cream Recipes
The BEST Ninja Creami Coffee Protein Ice Cream

Ultra-creamy, decadent, full of rich and bold coffee flavors with caramel notes, this Ninja Creami Coffee Protein Ice Cream will satisfy your sweet tooth and is the perfect treat for coffee lovers!
- Prep Time: 10 minutes
- Freezing Time: 24 hours
- Cook Time: 0 minutes
- Total Time: 24 hours 10 minutes
- Yield: 1 1x
- Category: Desserts
- Method: Freeze
- Cuisine: American
Ingredients
Ice Cream Base
- 100ml / 3.5 fluid ounces Ultra-Filtered Low-Fat Milk (such as Fairlife 2% Milk – note 1)
- 250ml / 1 cup Unsweetened Vanilla Almond Milk (or any nut, plant-based milk or other milk of choice)
- 30 grams / 1 scoop Rule 1 Lightly Salted Caramel Protein Powder (or vanilla or unflavored protein powder – note 2)
- 2.5 grams / ≈ 1 heaped TSP Instant Espresso Powder (or an instant strong coffee powder – preferably made from Arabica coffee beans)
- 32 grams / 2 TBSP + 2 TSP Brown Sugar Replacement, to taste (I used Swerve Brown Sugar – note 3)
- ¼ TSP Guar Gum (note 4)
- ⅛ TSP Xanthan Gum (optional – note 4)
Optional Mix-ins:
- Chocolate Chips/Chunks
- Chopped Protein Bars
- Nuts
- Cookie Pieces or Mini Cookies/Cookie Sandwiches
Optional Toppings:
- Chocolate or Caramel Sundae Syrup (I like Smucker’s sugar-free version)
- Natural Peanut Butter (made with just peanuts and salt or unsalted)
- Whipped Cream
- Traders Joe’s Hold the Cone Tips filled with Dark Chocolate (highly recommend!)
Instructions
- Combine the base ingredients: Add the ultra-filtered low-fat milk, unsweetened vanilla almond milk, salted caramel protein powder, brown sugar replacement, guar gum and xanthan gum to the Ninja Creami pint. Use a coffee frother or handheld immersion blender to blend until evenly combined. (You can use a mini blender or food processor to blend the ingredients instead too, then transfer the blended mixture to the pint container.)
- Freeze: Place the container in the freezer on a level surface and freeze for 24 hours (note 5) until frozen solid.
- Prepare for spinning: Remove the pint and set on the counter for 3-5 minutes. Then run the bottom of the container under hot water from the sink for 30 seconds to help loosen up the icy edges from the sides of the container. Pat-dry, then take off the pint lid. Place it in the outer bowl and lock the lid.
- Spin: Turn on your Ninja Creami and install the outer bowl into the machine. Press the “Light Ice Cream” button for the first spin. The ice cream will come out looking crumbly, but that’s perfectly normal.
- Shave down ice walls: Eject the outer bowl and remove the pint. Run a butter knife around the edges of the container to help incorporate any icy parts into the ice cream. Place the pint in the outer bowl again and cover and lock the lid. Reinstall into the machine and press the “Re-spin” button.
- Add mix-ins (optional): Eject the outer bowl from the machine and remove the lid. If adding any mix-ins, make a hole in the middle of the pint using the butter knife and push your mix-ins of choice all the way down. Cover and lock the lid. Reinstall into the machine run press the “Mix-In” cycle button.
- Enjoy! Remove the pint from the machine. Smooth the top with a spoon then scoop into serving dishes if you like. Top with desired toppings and enjoy!


Notes
- Ultra-Filtered Low-Fat Milk. I used Paul’s Hi-Calcium Low-Fat Milk which is an ultra-filtered long life Australian milk available in some parts of Asia. Ultra-filtered milk is higher in protein than regular milk and has less calories, making it a great choice for healthy low calorie Ninja creami ice creams. Milk with a high protein content also results in a creamier and thicker ice cream consistency. If you’re in the USA or Canada, you can use Fairlife 2% milk or any low-fat ultra-filtered milk from other brands such as Kroger CarbMaster, Organic Valley, Joyya, etc. If you live elsewhere, use any low-fat, semi-skimmed (2% milk) or regular whole milk. I don’t recommend using a fat-free milk or only almond milk as it will result in more ice crystals forming. The ice cream will not be as thick and creamy as you do need some fat to help with the texture.
- Salted Caramel Protein Powder. I used Rule 1 brand Lightly Salted Caramel whey protein powder. The protein powder gives caramelized sweet notes to the ice cream and thickens it. Vanilla protein powder or unflavored protein powder can be used instead too. However, add a teaspoon of vanilla bean paste or vanilla extract and additional sweetener to taste if using unflavored protein powder. See the ‘FAQs’ section in the post above if you’d like to use a protein shake instead.
- Brown Sugar Replacement. I used Swerve Brown Sugar which is made from erythritol and allulose. You can use a white sugar replacement but the coffee ice cream will have less caramelized tones. Feel free to use regular light brown sugar, granulated white sugar or any other sugar-free sweetener of choice.
- Guar gum and Xanthan Gum. Guar gum thickens the ice cream base and reduces the formation of ice crystals. It also helps in creating a scoopable ice cream texture. Xanthan gum serves a similar purpose as the guar gum. I find using both of these stabilizers together yields the best texture. However, this depends on the type of protein powder (whey, whey-casein blend, pure casein, or plant-based) you use and what stabilizers are already incorporated in it. If using pure casein protein powder, omit the xanthan gum as it will yield a thick and creamy ice cream without it. If you prefer not to use stabilizers in their natural form, you have a couple of options:
- Use 1 tablespoon of vanilla flavored sugar-free instant pudding mix. It already has stabilizers/emulsifiers such as soy lecithin or xanthan gum in it. Keep in mind that pudding mix is already sweetened so you will likely need less sweetener.
- Use cottage cheese or cream cheese. Use ½ cup (80-90 grams depending on the brand) low sodium or unsalted cottage cheese or cream cheese (1 ounce / 28 grams). You shouldn’t be able to taste it as the flavor will be masked by the other ingredients and the strong coffee flavor.
- Add Greek yogurt or protein yogurt. Add 2-3 tablespoons of plain Greek yogurt, other thick yogurt, or plain flavored or vanilla protein yogurt. You can omit the xanthan gum but I still would add a little guar gum to reduce the formation of ice crystals.
- Ninja Creami Deluxe. Multiply the ingredient amounts by 1.5 if you have a Ninja Creami Deluxe machine.
- Ice cream consistency. For ice cream with a soft serve consistency, run the “Re-spin” cycle twice after the initial “Light Ice Cream” spin. However, be careful as the friction and heat caused by multiple rounds of the “Re-spin” cycle may make the ice cream texture too melty and/or stringy.
- Make ahead. The ice cream base can be made and frozen up to 2-3 weeks in advance. Note that the longer it is store in the freezer the more ice crystals can form and the less sweet it will become over time. That said, I have frozen bases 2-3 months in advance and they turn out fine upon spinning.
- Storing leftovers. If you can’t finish the ice cream, level and smooth out the top with the back of a spoon. Cover and refreeze. It will freeze solid again. When ready to enjoy the leftovers, spin on “Light Ice Cream” again. DO NOT spin on the “Re-spin” function as the ice cream has frozen back into its original state. Using the “Re-spin” function when the mixture is frozen solid can damage the machine and the paddle blade.
- Nutrition information. The nutritional information provided is an estimate for the ice cream base only. The information will vary with any ingredient substitutes and if adding any toppings or mix-ins.
- See the ‘Variations’ section in the post above for more tips on customizing this coffee protein ice cream.
Nutrition
- Serving Size: 1 pint
- Calories: 205
- Sugar: 6.1g
- Sodium: 124.2mg
- Fat: 4.3g
- Saturated Fat: 0.8g
- Unsaturated Fat: 3.4g
- Trans Fat: 0.1g
- Carbohydrates: 7.7g
- Fiber: 1.5g
- Protein: 30.8g
- Cholesterol: 6mg
This post may contain affiliate links. We are a part of the Amazon Services LLC Associates Program, an affiliate advertising program designed to provide a means for us to earn a small commission (at no extra cost to you) by linking to Amazon.com and affiliated sites. The nutritional information provided is approximate and can vary based on several factors. It should only be used as a general guideline. For more information, please see our Disclosure.


I bought a Ninja Creami because of the recipes and now try them all the time.
I looked at I’d say close to a dozen ice cream recipes before I ever bought a Ninja creami and chose your coffee ice cream because of it. And fell in love with it! Than I made the peanut butter protein ice cream and loved it too (peanut butter addict here lol). Definitely following your recipes from now on 🙂
Hi Paul! Thanks so much for your compliments on the coffee and peanut butter protein ice creams! I’m happy that you loved them so much and found my site. 🙂 Excited for you to try other delicious flavors in the Ninja Creami! Thanks again for your comment and rating! 🙂