S’mores Ice Cream (No Churn)
This post contains affiliate links.
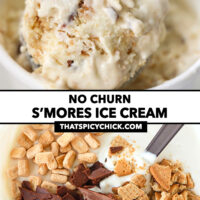
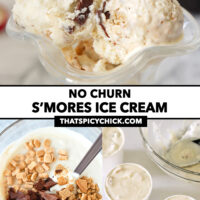
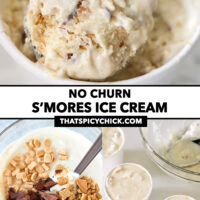
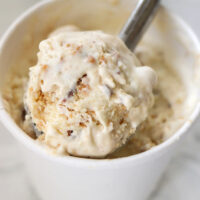
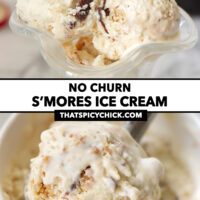
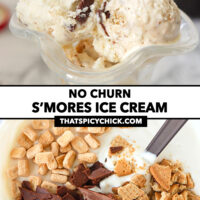
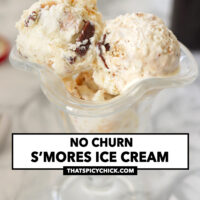
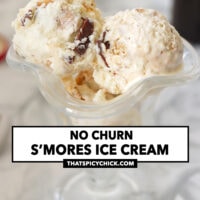
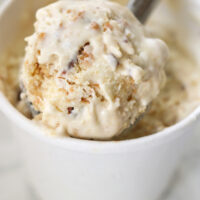
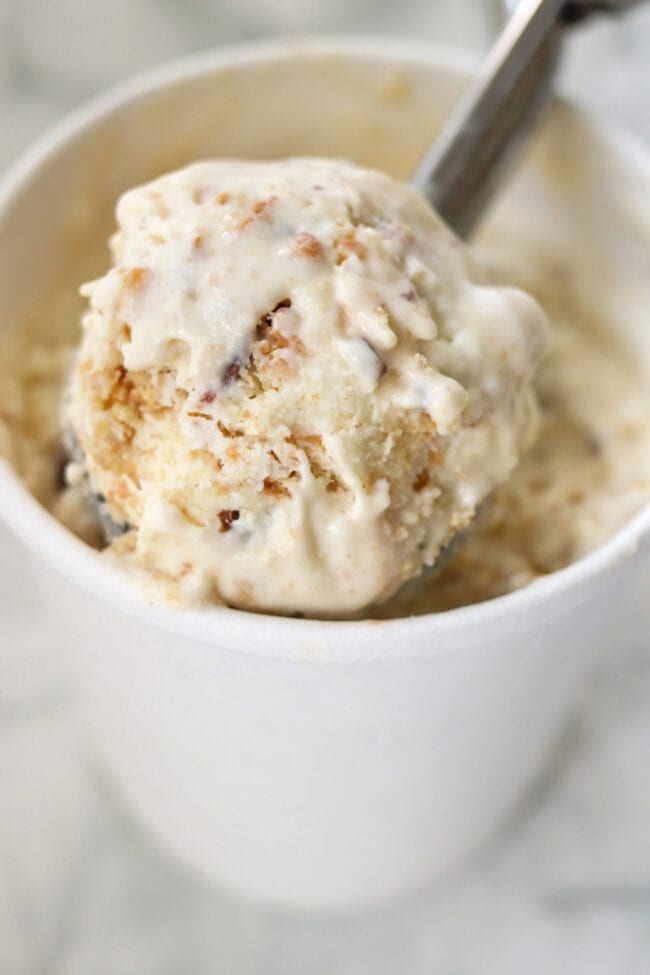
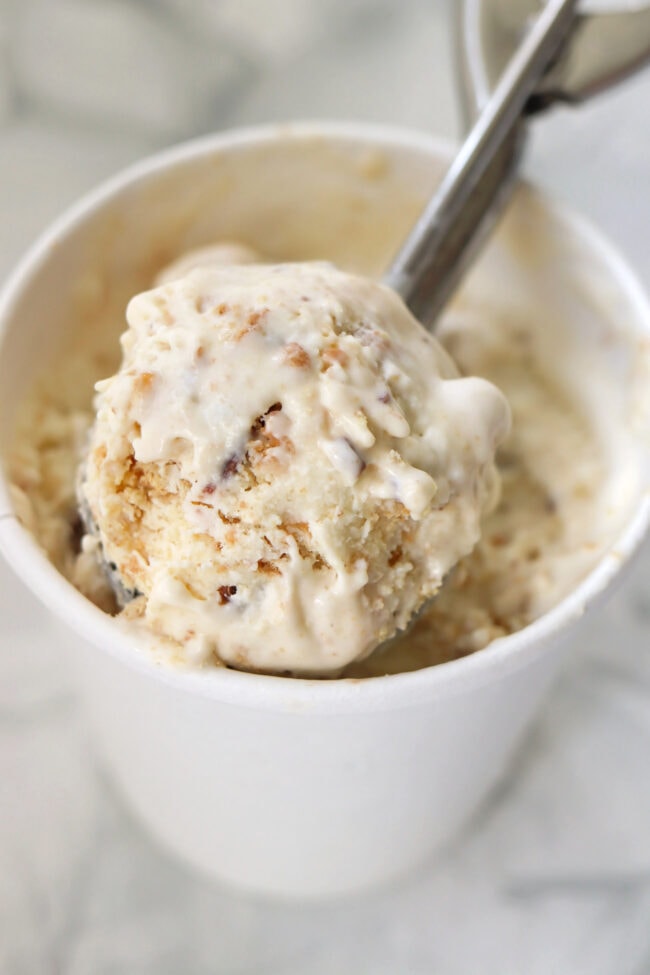
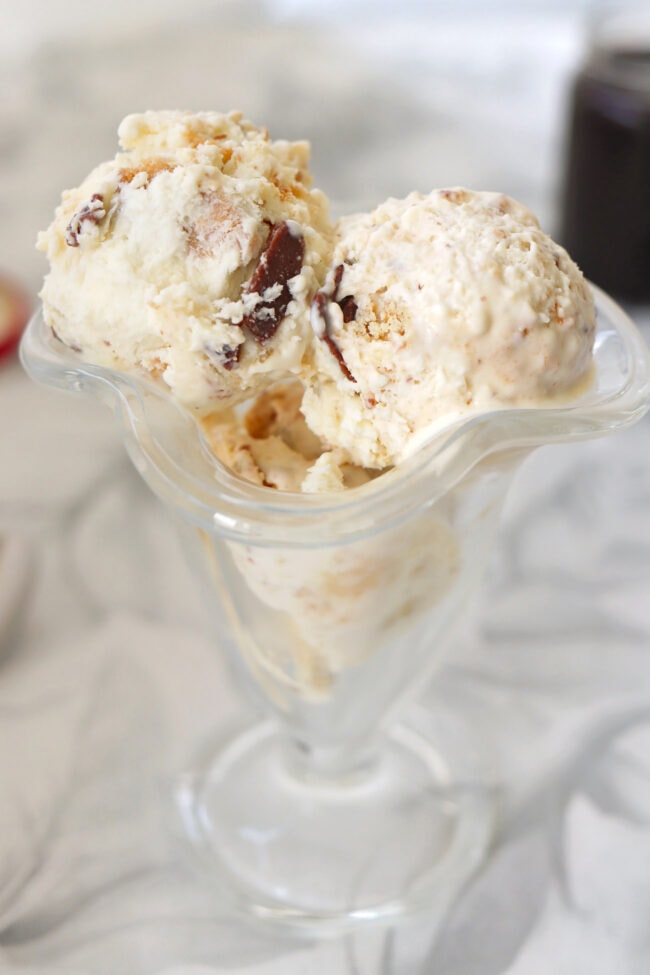
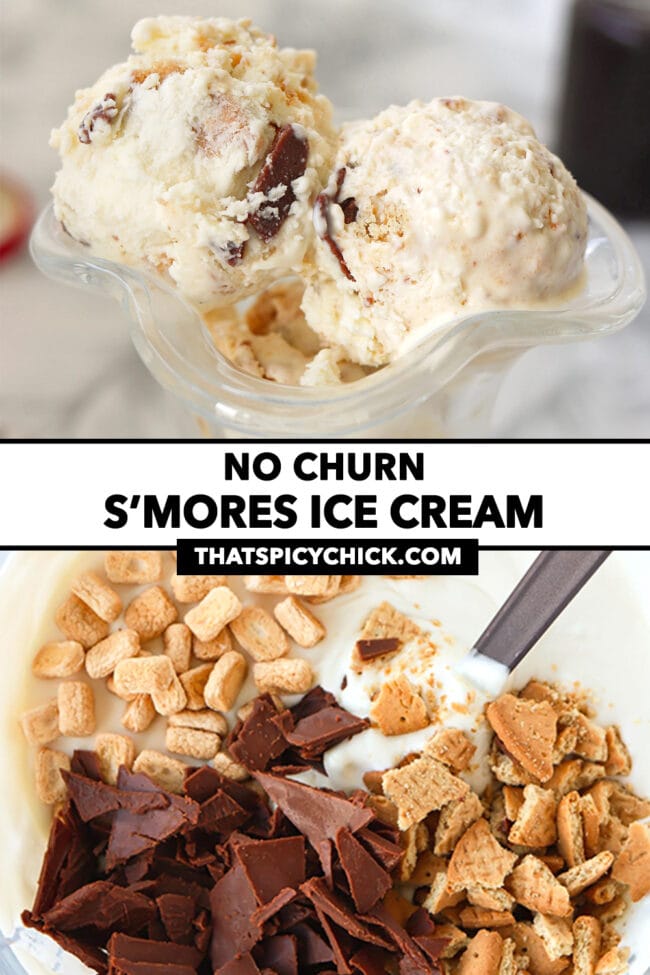
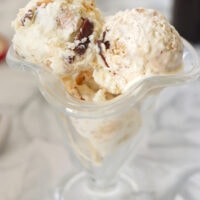
Toasted marshmallows, milk chocolate shards, and crushed Digestive biscuits come together in a luscious and creamy vanilla ice cream to make this summertime favorite no churn S’mores Ice Cream! It’s easy to make, doesn’t require an ice cream maker, and is truly delicious!

Summer isn’t complete without some form of s’mores, and this no churn S’mores Ice Cream captures the spirit of summer in the best way possible! ☀️
It’s the perfect frozen treat to beat the heat, simple enough and easy to make, and really, really GOOD!
We have toasted golden marshmallows, chocolate shards that ACTUALLY melt upon contact with your mouth and aren’t hard, crushed savory and wholesome Digestive biscuits, and a luscious and creamy vanilla ice cream base! 😋
While I’ve used Digestive biscuits in this version of s’mores ice cream, you’re more than welcome to use graham crackers if they’re easily available where you are.
Why This Recipe Works
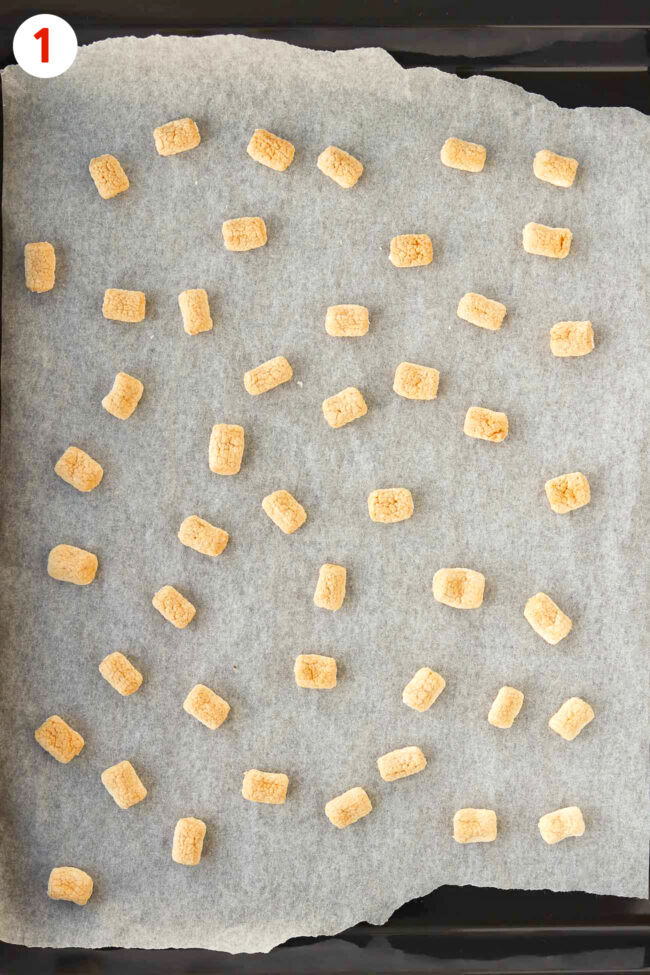
- You don’t have to mess with a campfire to toast the marshmallows – just pop them under the broiler for a minute and they’ll become nicely toasted and golden.
- Using homemade chocolate shards as opposed to store-bought chocolate bars means that there are no hard and brittle pieces of chocolate when you eat the ice cream. The chocolate shards will melt with the heat from your mouth.
- You can customize it to make it gluten-free or vegetarian/vegan if needed.
Ingredients
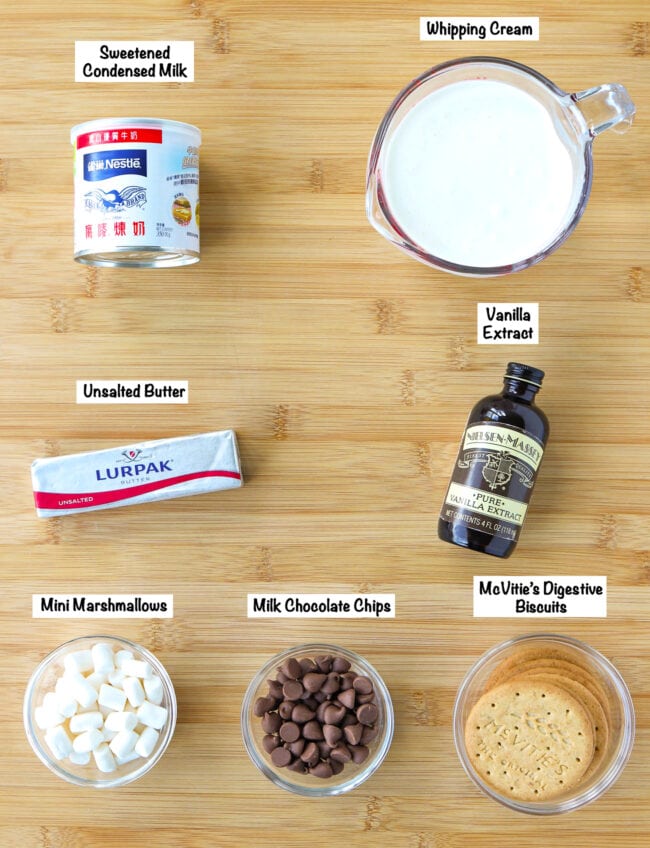
- Mini Marshmallows: Use marshmallows that don’t have gelatin such as Dandies Mini Marshmallows if you’d like to make this ice cream vegetarian.
- Milk Chocolate Chips: Or you can use semi-sweet chocolate chips if you prefer.
- Unsalted Butter: To help the chocolate chips melt.
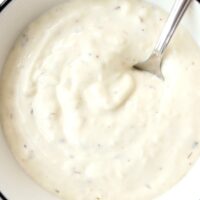
- Heavy Whipping Cream: Make sure that the cream has a minimum of 35% fat content per 100 grams. You can also use heavy cream instead, or double cream if you are in the UK.
- Sweetened Condensed Milk: This will provide the sweetness to the ice cream.
- Vanilla Extract: Feel free to add an extra teaspoon than what I’ve indicated if you’d like a stronger vanilla ice cream flavor.
- Digestive Biscuits or Graham Crackers: Here in Hong Kong (and also some other parts of the world), graham crackers aren’t as easily available. Digestive biscuits are a great substitute, hence why I’ve used them in this version of s’mores ice cream. Either will work, and both taste great!
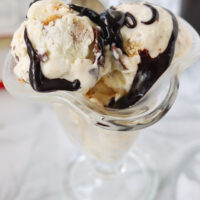
- Hot Fudge Sauce: Optional, but highly recommended for serving! You can use either a homemade or store-bought one. I highly recommend the Kay Rentschler’s hot fudge sauce recipe on NYT Cooking. I halved the ingredients amounts and used it for serving with this ice cream. It’s a match made in heaven!
Full ingredient amounts are in the recipe card below.
How to Make No Churn S’mores Ice Cream
1. Toast the marshmallows. Spread them out on a parchment paper lined baking tray (or use a silpat baking mat). Pop them under the oven broiler for about a minute, or until golden brown and toasted. (If your oven doesn’t have a broiler setting, I’ve included temperatures to preheat the oven at in the recipe card below.) Transfer to a cooling rack and set aside.
2. Make the chocolate shards. Melt the unsalted butter and milk chocolate chips in a microwave safe measuring cup until smooth. Pour the mixture onto a parchment paper lined baking tray and spread it out in an even and thin layer. Pop the tray in the freezer for a couple of minutes until firm.
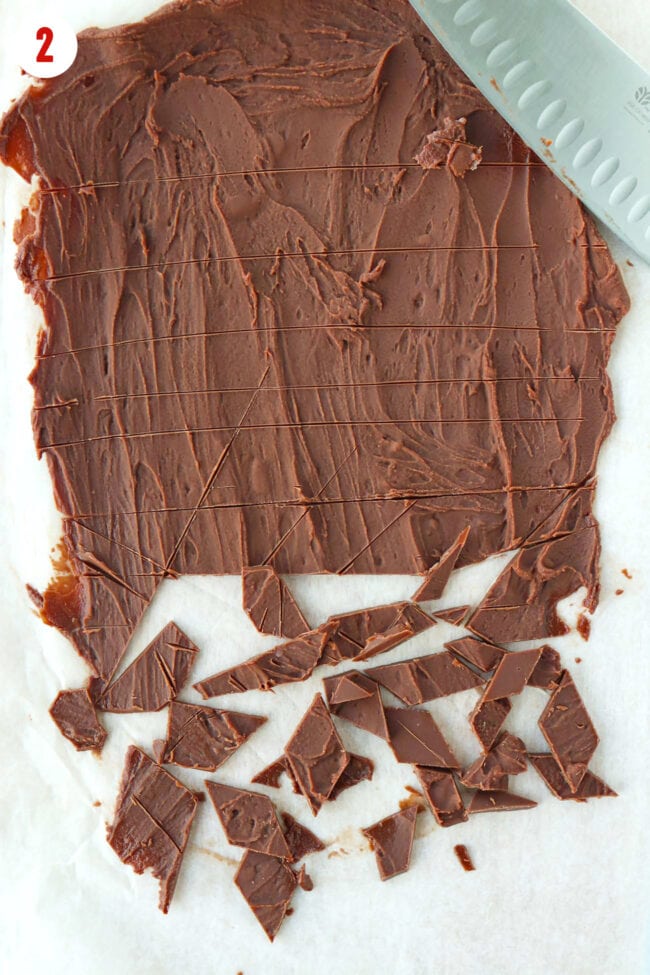
Then transfer to a cutting board and cut into shards of your desired size using a knife. Store the chocolate shards in the freezer until needed. (I simply place the tray back in the freezer.)
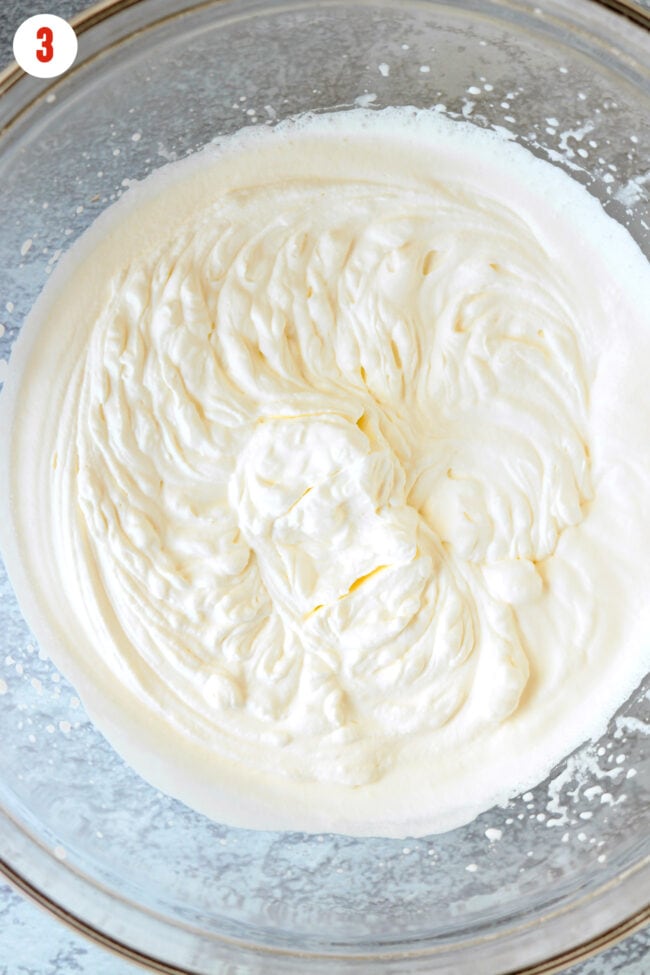
3. Make the whipped cream: Use either an electric hand mixer or stand mixer with the whisk attachment. Beat the cream until stiff peaks form.
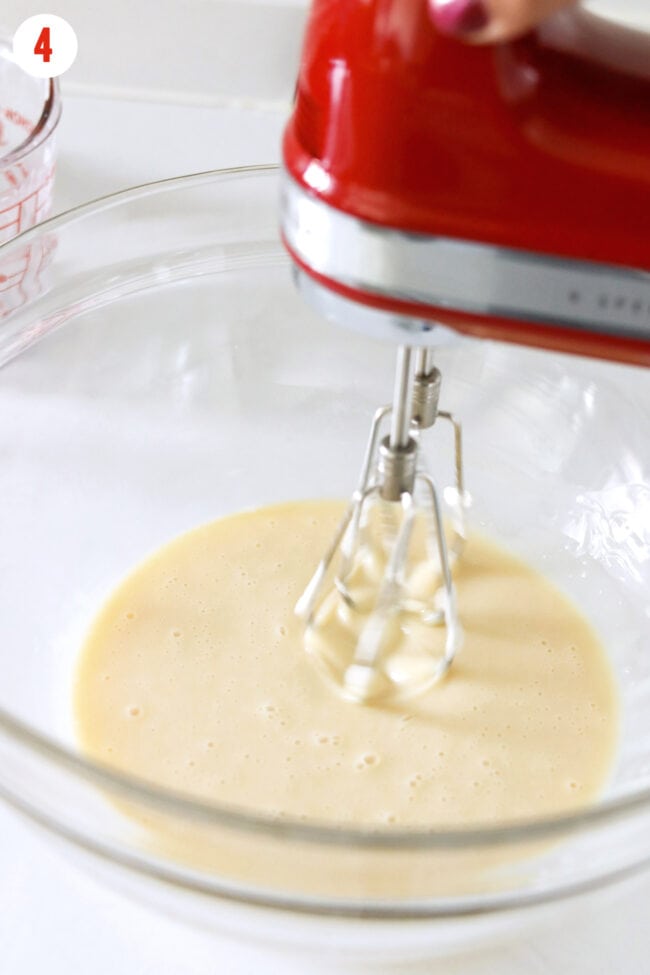
4. Beat the sweetened condensed milk and vanilla: Do this in another large mixing bowl and beat only for a minute to combine. (No need to wash or clean the beaters in between of making the whipped cream.)
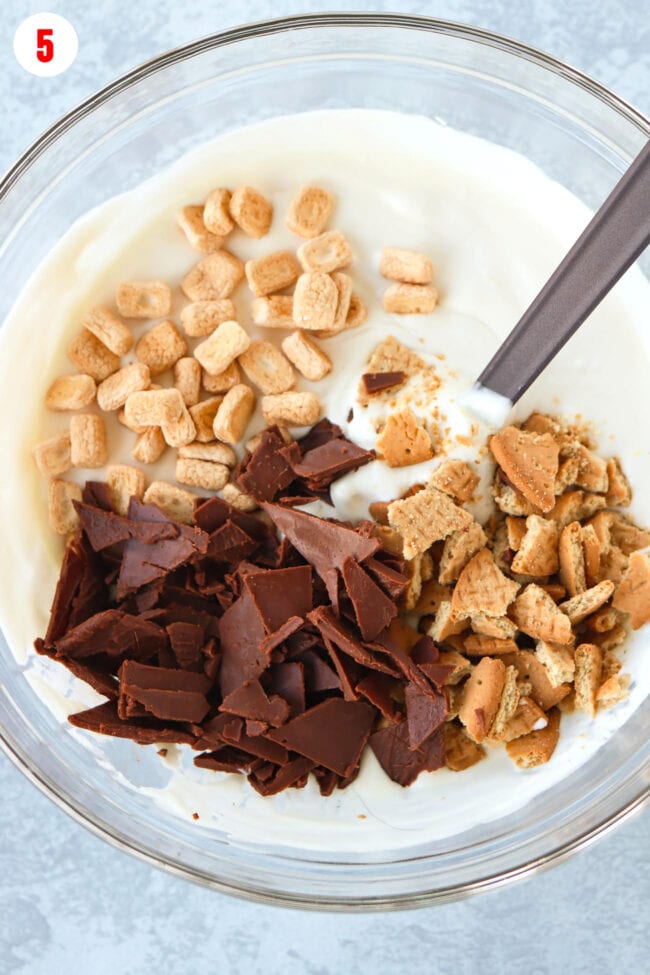
5. Fold: Gently fold the whipped cream into the sweetened condensed milk mixture. The mixture should be slightly thick and creamy. Then fold in the toasted mini marshmallows, chocolate shards, and crushed Digestive biscuits until combined.
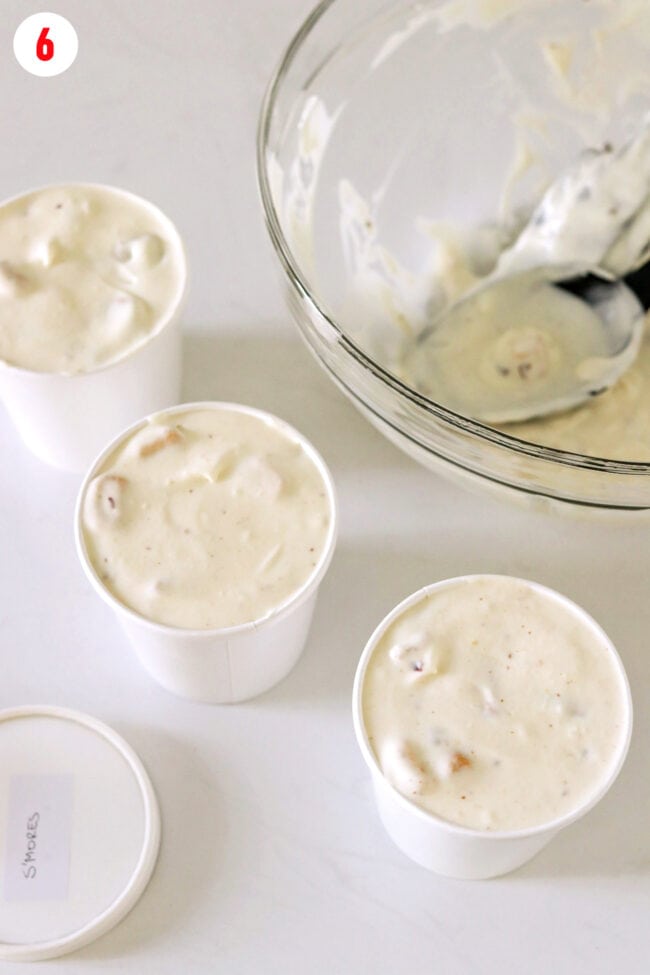
6. Freeze: Transfer to ice cream paper cartons or other type of sealable freezer safe airtight container such as insulated ice cream tubs, or a bread loaf pan. Cover with parchment paper or cling wrap, making sure that it touches the ice cream. Then seal and freeze for 4-6 hours, or until solid.
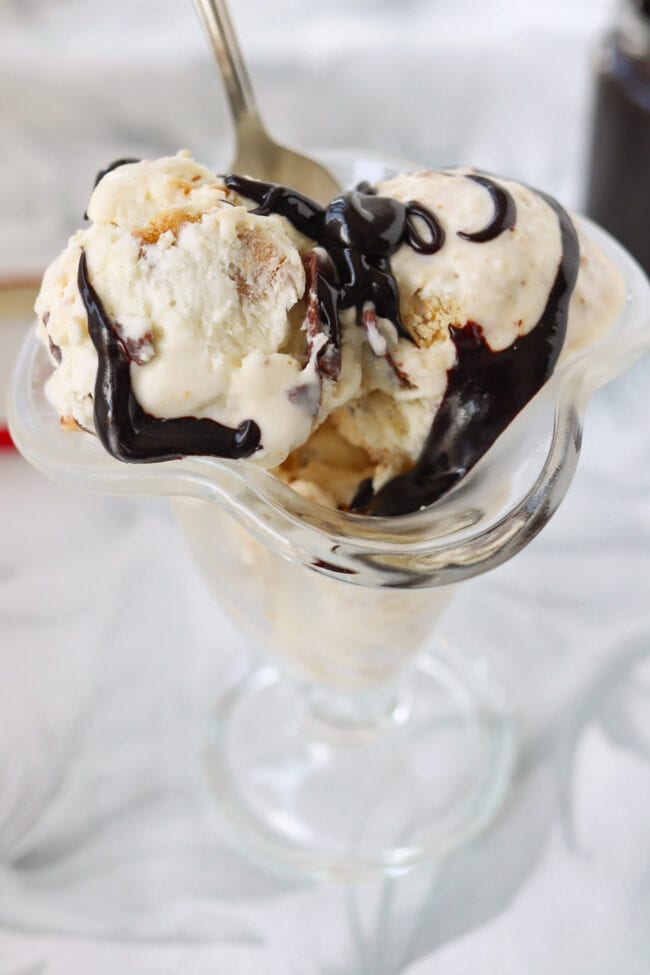
7. Serve: When ready to serve, place the container on the counter at room temperature for a few minutes. Then scoop, serve, and enjoy with a big drizzle of hot fudge sauce if desired!
Full detailed instructions are in the recipe card below.
Cook’s Tips
- Keep an eye on the marshmallows while they’re in the oven. They can burn easily and catch on fire if left too long in there so DO NOT walk away.
- Chill the mixing bowl and beaters of the electric hand mixer. Place them in the fridge or even freezer for 20 minutes, and make sure that your cream is chilled too. This will make making the whipped cream quicker.
- Take your time to fold. Be gentle and patient when folding the whipped cream into the sweetened condensed milk and vanilla mixture. Stirring quickly instead of folding will knock the air out and deflate the ice cream mixture, which will result in a less creamy ice cream.
FAQs
Yes, you technically can. But a higher fat content in the cream is preferred in order for the ice cream to have a nice and creamy texture. I recommend using either heavy whipping cream, heavy cream, or double cream if you are in the UK. A cream with a fat content of 35% per 100 grams will work best to make no churn ice cream.
If you use marshmallows made with corn starch instead of wheat starch, and gluten-free Digestive biscuits (available at Tesco if you are in the UK) or graham crackers (Schär, Kinnikinnick, and Pamela’s), then this s’mores ice cream can be made gluten-free. Make sure that the chocolate chips you’re using are gluten-free too.
Use vegan mini marshmallows such as Dandies, dairy-free butter, dairy-free chocolate chips, vegan sweetened condensed milk (Carnation has one that isn’t coconut milk/cream based), and a dairy-free whipping cream to make it vegan. Make sure that the Digestive biscuits or graham crackers you’re using are dairy-free too. Most are, but it’s best to double check the ingredients label to be sure.
If stored properly in a sealed airtight freezer safe container in the freezer, the ice cream will last for 3-4 weeks.
More Ice Creams & Summer Treats
- Baileys Strawberries & Cream Ice Cream (No Churn)
- Baileys Salted Caramel Peanut Butter Ice Cream (No Churn)
- Strawberry Lemon Cream Cake
- Lemon Burnt Basque Cheesecake
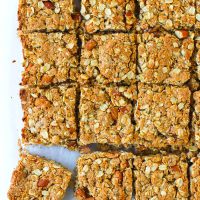
- Apricot Almond Oat Slice
- Or browse the entire Summer and Desserts recipe collections.
MADE THIS RECIPE? Please leave a comment and a ⭐️⭐️⭐️⭐️⭐️ star rating below and let me know how you liked it! You can also take a photo and tag it with @thatspicychick on Instagram and hashtag it #thatspicychick. I love seeing your creations!
STAY CONNECTED! You can also follow me on Pinterest, Facebook or Instagram.
Sign up for my email list to get my latest recipe in your inbox weekly!
S’mores Ice Cream (No Churn)
Toasted marshmallows, milk chocolate shards, and crushed Digestive biscuits come together in a luscious and creamy vanilla ice cream to make this summertime favorite no churn S’mores Ice Cream!
- Prep Time: 20 minutes
- Freezing Time: 6 hours
- Cook Time: 2 minutes
- Total Time: 6 hours 22 minutes
- Yield: 3 pints 1x
- Category: Dessert
- Method: Freeze
- Cuisine: American
Ingredients
- 1/2 cup Mini Marshmallows
- 60 grams / 1/3 cup Milk Chocolate Chips (or use semi-sweet chocolate chips)
- 28.4 grams / 2 TBLS Unsalted Butter
- 500ml / 16.9 ounces Heavy Whipping Cream (minimum 35% fat content)
- 350 grams / 12.35 ounce can Sweetened Condensed Milk
- 2 TSP Pure Vanilla Extract
- 77 grams / 1 cup crushed Digestive Biscuits (or Graham Crackers)
- To Serve (optional): Hot Fudge Sauce (homemade or store-bought)
Instructions
- Toast the marshmallows: Preheat oven to 250°C/480°F/Gas Mark 9 (or switch on the broiler setting). Line a baking tray with parchment paper (nonstick cooking paper), and spread out the mini marshmallows on top. Place in the oven on the top rack for 1 minute or until toasted and golden brown. Transfer the tray to a wire cooling rack and allow to cool completely. Set aside until needed.
- Make the chocolate shards: Melt the unsalted butter and milk chocolate chips in a microwave safe measuring cup (or bowl) on medium power for 30-40 seconds, stirring in between until smooth. Pour the chocolate mixture on a parchment paper lined baking tray. Use an offset or silicone spatula (or the back of a large spoon) to smooth out the chocolate in a thin layer. Place in the freezer for 15-20 minutes, or until firm. Transfer to a cutting board and cut the chocolate into shards of your desired size. Store in the freezer until needed.
- Make the whipped cream: Pour the heavy whipping cream into a large mixing bowl. Using an electric hand mixer (or stand mixer with the whisk attachment), beat the cream starting on low speed and increasing the speed as the cream thickens, until stiff peaks form – about 4-12 minutes. (Note: Time for beating the cream is approximate and will vary depending on several factors such as environmental conditions, how cold the cream is, etc.)
- Beat the sweetened condensed milk and vanilla: Combine the sweetened condensed milk and vanilla extract in another large mixing bowl. Beat with the electric hand mixer (no need to wash or clean the beaters after making the whipped cream) on medium speed for 1 minute until combined well.
- Fold: Starting with one big dollop, gently fold the whipped cream into the sweetened condensed milk mixture to lighten it up a little. Then add the rest of the whipped cream and gently fold until combined well. The mixture should be slightly thick and creamy. Now gently fold in the toasted mini marshmallows, chocolate shards, and crushed Digestive biscuits until combined.
- Freeze: Transfer to ice cream paper cartons, or other type of sealable freezer safe airtight container such as insulated ice cream tubs, or a bread loaf pan. Cover the surface with parchment paper or cling wrap, making sure that it touches the ice cream. Seal the container(s) with its lid, then freeze for 4-6 hours or until solid. (If using a bread loaf pan, simply cover well with the parchment paper or cling wrap to ensure ice crystals don’t form during freezing.)
- Serve: Once the ice cream is solid, place on the counter at room temperature for 5-10 minutes until slightly softened. Scoop into bowls and drizzle hot fudge sauce on top if desired, then enjoy!


Notes
- Storing: Store in a sealed airtight freezer safe container in the freezer for 3-4 weeks. If storing in a bread loaf pan for more than a few days, transfer the ice cream to a freezer safe sealed airtight container so that it can stay fresh longer and ice crystals don’t start to form.
- To make it gluten-free: Use marshmallows made with corn starch instead of wheat starch, and gluten-free Digestive biscuits (available at Tesco if you are in the UK) or graham crackers (Schär, Kinnikinnick, and Pamela’s). Make sure that the chocolate chips you’re using are gluten-free too.
- To make it vegan: Use vegan mini marshmallows such as Dandies, dairy-free butter, dairy-free chocolate chips, vegan sweetened condensed milk (Carnation has one that isn’t coconut milk/cream based), and a dairy-free whipping cream to make it vegan. Make sure that the Digestive biscuits or graham crackers you’re using are dairy-free too. Most are, but it’s best to double check the ingredients label to be sure.
Nutrition
- Serving Size: 1 scoop
- Calories: 249
- Sugar: 21.4g
- Sodium: 44.8mg
- Fat: 14.8g
- Saturated Fat: 9.2g
- Unsaturated Fat: 3.7g
- Trans Fat: 0.3g
- Carbohydrates: 25.6g
- Fiber: 0.9g
- Protein: 90.6g
- Cholesterol: 38.9mg
This post may contain affiliate links. We are a part of the Amazon Services LLC Associates Program, an affiliate advertising program designed to provide a means for us to earn a small commission (at no extra cost to you) by linking to Amazon.com and affiliated sites. The nutritional information provided is approximate and can vary based on several factors. It should only be used as a general guideline. For more information, please see our Disclosure.