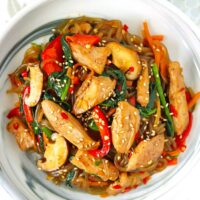
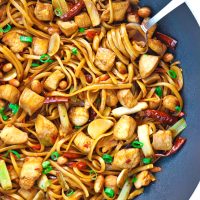
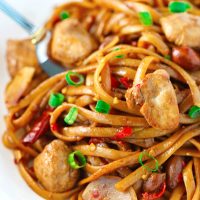
Kung Pao Chicken Linguini
This post contains affiliate links.
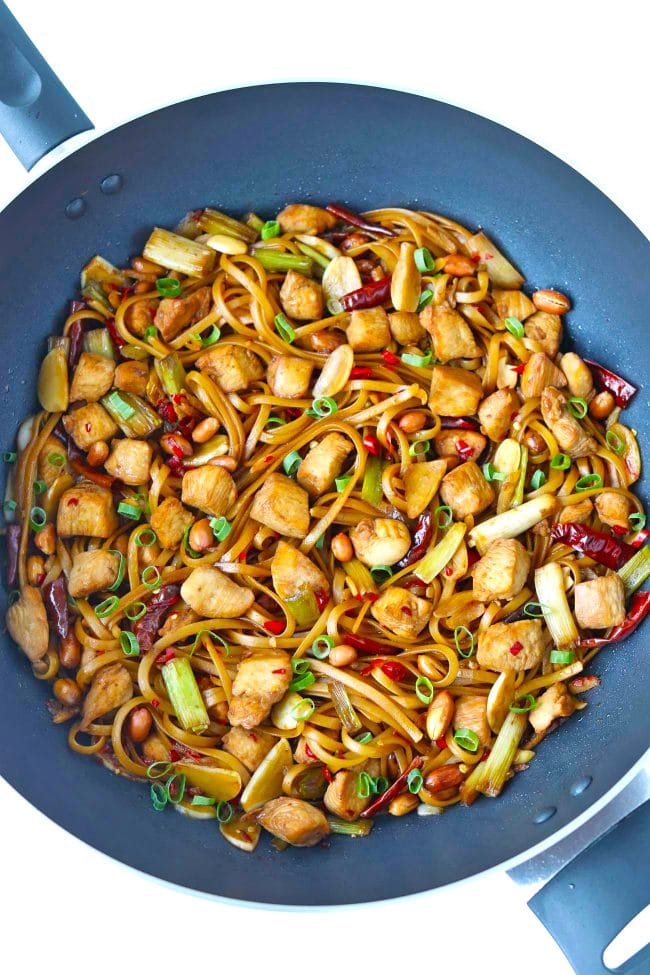
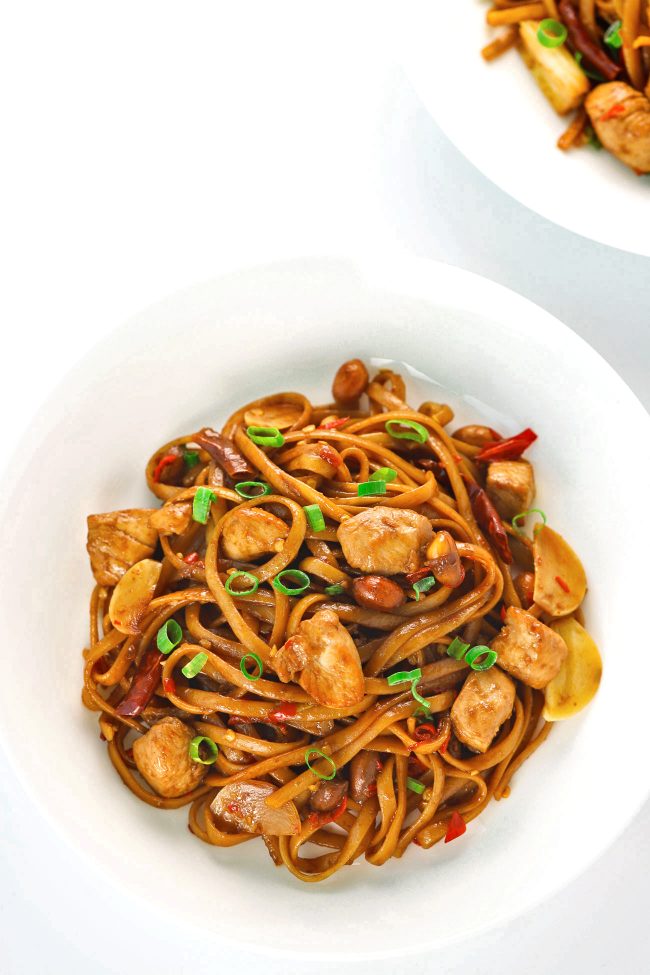
This Kung Pao Chicken Linguini is a quick and easy stir-fry that’s made with tender pieces of chicken, aromatics, and linguini, and everything is tossed in a wickedly delicious spicy, sweet, and slightly tangy sauce! It’s perfect for easy dinners on busy weeknights and can easily be customized with your favorite protein like shrimp, pork, beef, or tofu and/or veggies!

Hello, hello again friends!
It’s officially noodles and pasta season here on That Spicy Chick because:
a. I’ve been on a roll and have plenty of spicy, creamy (and non-creamy), brand-spanking-new and epic noodles and pasta goodness to share with you!
b. When is it ever not a good time for noodles or pasta?
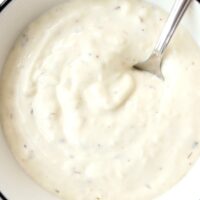
While I am going to be slipping in an easy Homemade Spicy Mayonnaise recipe next week, since…you know, it is still SUMMER and burger season after all… but the rest of the next few recipes are all about my noods and pasta obsession! So please climb aboard this noodle and pasta train and buckle up! It’s going to be a smooth, silky, slurp-i-li-cious and delicious ride! 😋
We’re kicking of this mini-series with Kung Pao Chicken Linguini this week, and it’s one of my all-time favorite noodles (well technically pasta), easy back-pocket weeknight stir-fries!
ABOUT THIS KUNG PAO CHICKEN LINGUINI
First off, if you’re looking for a California Pizza Kitchen Kung Pao Chicken Spaghetti copycat recipe, you’re not going to find it here. But if you are looking for a quick and easy, Asian-inspired noodle stir-fry to feed your family on busy weeknights, you have come to the right place!
This Kung Pao Chicken Linguini actually boasts traditional Kung Pao Chicken aromatics and sauces, like in the dish that you get in Sichuan restaurants in Asia.
As you know from my Spicy Kung Pao Chicken recipe, I truly, utterly, and madly and deeply love a good KPC. In fact, I adore it so much that even though I make it at home sometimes, I still often (like a BAZILLION JILLION GODZILLIAN times a year often) get it whenever I grab takeaway from my favorite Sichuan restaurant in my ’hood (and in the whole of Hong Kong AND world for that matter!).
This one time, I took a peek in their kitchen since I’m nosy curious like that. (They allowed me since we’re like BFFs now given how many times I eat their KPC.) I saw them make the KPC I love so dearly much and the sauces that they used. And since I love their magnificent KPC so much, I created a noodle version that was inspired by it. And that my friends, is how this Kung Pao Chicken Linguini was born!

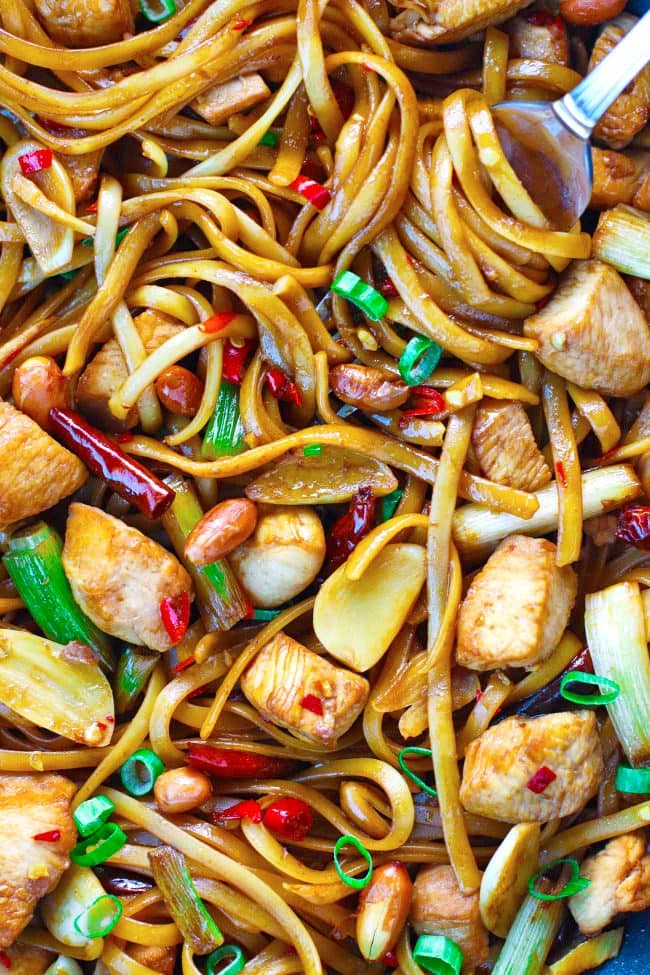
It’s completely bursting with flavor, made with my two favorite foods – spicy KPC and NOODLES (err…PASTA!), and is simply just soooo darn good!!
And you know what? I think you’re going to love it too!
KUNG PAO CHICKEN LINGUINI INGREDIENTS
To make this Kung Pao Chicken Linguini recipe, you will need the following ingredients:
- Chicken: I recommend using boneless and skinless chicken breasts. But feel free to use boneless and skinless chicken thighs if you prefer. You’ll need to dice the chicken and marinate it in some cornstarch, low sodium light soy sauce, and Shao Xing rice wine.
- Aromatics & Chilies: The Chinese stir-fry holy trinity – garlic, ginger, and spring onion (the white parts only for the stir-fry). You’ll also need both fresh red chilies and the traditional Chinese (or Thai) dried red chilies for some heat. While fresh red chilies are not usually in a traditional Kung Pao Chicken, I like to add them because I am a big time spice aficionado! But feel free to leave it out (or leave both types of chilies out) if you would to make this mild.
- Noodles: I like linguini because it has more bite to it than spaghetti. But you can use any type of noodle pasta that you like, or even any type of Asian noodles that stir-fry well.
- Peanuts: I use Chinese style fried brown peanuts because they taste fantastic and I can easily find them in any supermarket or small shops near the wet market here in Hong Kong. They should be available in your local Chinatown if there is one where you live. However, if you don’t have easy access to them, just use dry roasted salted peanuts as they will work just fine.
- Kung Pao Chicken Stir-fry Sauce: A combination of low sodium light soy sauce, Shao Xing rice wine, Chinkiang vinegar, dark soy sauce, sesame oil, and a little bit of white sugar to balance out the salty and tangy flavors. You should be able to locate these ingredients in any big supermarket and in your local Asian groceries store.
- Garnish: I top these noodles with freshly chopped spring onion (the green parts only). They aren’t necessary, but it just makes the dish look so pretty! Also, why not use the greens since you already have them on hand and needed the whites for the stir-fry? 😉
- Oils: I use peanut oil for the stir-fry, but feel free to use any oil with a high smoke point (i.e. avocado oil) that you have on hand. I also use a little sesame oil to make the dish more aromatic, and chili oil for a little extra kick of heat! The latter is completely optional, so feel free to leave it out if you don’t want the extra heat.
HOW TO MAKE KUNG PAO CHICKEN LINGUINI
Since this is a stir-fry noodle/pasta recipe and things will cook quickly once they hit the wok, I recommend getting all the prep work out of the way first. So here we go!
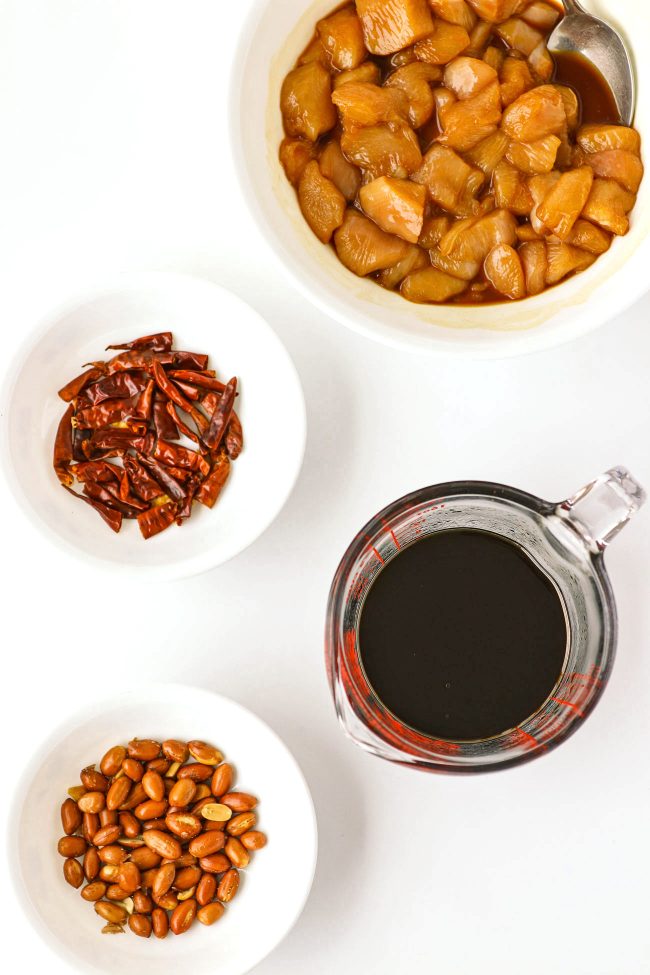
- Marinate the chicken: Dice the chicken breasts into bite-sized pieces. Then combine all the ingredients for the chicken marinade in large bowl and mix thoroughly with a spoon to combine.
- Make the sauce: Combine all the ingredients for the sauce in a measuring cup or bowl and whisk until fully combined.
- Prepare the fresh and dry ingredients: Chop the garlic, fresh red chilies, ginger, and the spring onion, and cut the dried red chilies in halves and thirds (depending on their length). Set everything aside until ready to use.
- Cook the linguini: Cook the linguini al–dente according to package directions in a large pot of salted water. Then drain and set aside. (I like to run water over my pasta to prevent them from sticking and cooking further.)
Now that all of our ingredients are ready to go, it’s time to start cooking the Kung Pao Chicken Noodles! Simply…
- Cook the chicken: Heat some peanut oil in a wok over medium-high heat. Once the oil is hot, add the chicken pieces and cook for 1 minute without touching them. Then continuously toss until the chicken is brown on all sides. Use a slotted spoon to scoop the chicken into a strainer and allow the excess oil to drip into the wok. Transfer the chicken to a clean bowl. Then wipe out the wok with paper towels and set it back on the stove.
- Cook the aromatics and chilies: Heat remaining peanut oil, sesame oil, and chili oil (if using) in the wok over medium-high heat. Once hot, add the spring onion whites, garlic, and ginger and cook until fragrant. Then add the dried red chilies, peanuts, and fresh red chilies to the wok and stir-fry for another minute.
- Combine everything: Add the chicken pieces back into the wok and toss to combine with the aromatics, chilies, and peanuts. Then add the noodles and immediately pour the sauce over them. Continuously toss and cook for a couple of minutes until the sauce thickens. Then remove the wok from the heat.
- To Serve: Divide the Kung Pao Chicken Linguini in four plates or transfer to a serving dish. Garnish with the spring onion greens and serve immediately while it’s nice and hot!
VARIATIONS
If you’d like to customize your Kung Pao Chicken Linguini, you can…
- Make it vegetarian (or vegan): Instead of chicken, you can make this with a firm tofu block diced up into cubes. However, instead of marinating the tofu, I recommend pan-frying the cubes in salt and pepper until brown on all sides. Then just add it to the stir-fry when you would add the chicken back into the wok. While I find it unnecessary to coat the tofu cubes with cornstarch since they usually crisp up perfectly without it, you are most welcome to do so if you would like extra crispy tofu cubes. Also, you can add additional soy sauce to the sauce for the stir-fry if you feel it’s needed.
- Add veggies: I kept it simple and only used aromatics in this noodle stir-fry since traditional Kung Pao Chicken doesn’t have any veggies in it. But feel free to add any of your favorite stir-fry friendly veggies like bell peppers, snap peas, mushrooms, onion, carrots, etc.
- Make it gluten-free: Use Tamari or gluten-free soy sauce in place of the low sodium soy sauce. In addition, you should also use a gluten-free dark soy sauce, and either balsamic or white vinegar in place of the Chinkiang Vinegar. Last but not least, be sure to use gluten-free pasta (or noodles).
- Swap the protein: Feel free to swap the chicken for beef, pork, or shrimp. My personal favorite is the shrimp version (after this chicken one of course)!
- Swap the noodles/pasta: Fettuccine, bucatini, spaghetti, udon, egg noodles, Hokkien noodles are all great options this stir-fry.
MORE NOODLE & PASTA RECIPES
Looking for some more simple and easy noodle or pasta recipes? Below are some of my favorites!
- Creamy Spicy Korean Udon Noodles with Bulgogi Chicken
- Spicy Dan Dan Noodles with Wontons
- Stir-fried E-fu Noodles with Shrimp
- Spicy Chicken Penne Pasta
- Creamy Buffalo Sauce Bacon Mac and Cheese
- Chili-Lime Cream Sauce Pasta with Peri Peri Chicken
- Or browse the entire noodles and pasta recipe collections.
Check out the other recipes from this Noodles & Pasta mini-series!
- Sundried Tomato Pesto Pasta with Cajun Chicken
- Spicy Korean Seafood Soup Noodles (Jjamppong)
- Sichuan Sauce Noodles Stir-fry
- Cream Sauce Seafood Pasta (with White Wine Cream Sauce)
MADE THIS RECIPE? Please leave a comment and a ⭐️⭐️⭐️⭐️⭐️ star rating below and let me know how you liked it! You can also take a photo and tag it with @thatspicychick on Instagram and hashtag it #thatspicychick. I love seeing your creations!
PrintKung Pao Chicken Linguini
This Kung Pao Chicken Linguini is a quick and easy stir-fry that’s made with tender pieces of chicken, aromatics, and linguini, and everything is tossed in a wickedly delicious spicy, sweet, and slightly tangy sauce! It’s perfect for easy dinners on busy weeknights and can easily be customized with your favorite protein like shrimp, pork, beef, or tofu and/or veggies!
- Prep Time: 15
- Cook Time: 15
- Total Time: 30 minutes
- Yield: 4 1x
- Category: Pasta/Noodles
- Method: Stir-fry
- Cuisine: Asian-inspired
Ingredients
- 8 Garlic cloves – thinly sliced
- 1.5 inch knob of Ginger – chopped into thin strips
- 8–12 Red Chilies, to taste – roughly chopped (deseed if less heat is desired or omit entirely)
- 6–8 Spring Onion (white parts only) – chopped into 1 inch pieces
- 8 oz. uncooked Linguini (you can use spaghetti or any other noodle type of pasta if you like)
- 5 TBLS (about 48g) Chinese Brown-skinned Fried Peanuts (or substitute with Roasted Peanuts)
- 5–10 Dried Red Chilies, to taste – cut into halves and thirds depending on size
- 2 TBLS Peanut Oil (or any other cooking oil, preferably with a high burning point)
- 1.5 TSP Chili Oil (optional)
- 2 TSP Sesame Oil
For the Sauce:
- 1 TBLS + 1 TSP (4 TSP) White Sugar
- 6 TBLS (3/8 cup) Low Sodium Light Soy Sauce
- 5 TBLS Shao Xing Rice Wine
- 2 TBLS Chinkiang Vinegar
- 1 TBLS Dark Soy Sauce
- 1 TBLS + 1 TSP (4TSP) Sesame Oil
For the Chicken Marinade:
- 2 TSP Corn Starch
- 2 TBLS Low Sodium Light Soy Sauce
- 1 TBLS Shao Xing Rice Wine
- 2 Chicken Breasts (about 400g), boneless, skinless
For Garnish:
- 1 Spring Onion (green part only) – chopped
Instructions
Prep:
- Marinate the chicken: Dice the chicken breasts into bite-sized pieces. Then combine all the ingredients for the chicken marinade in large bowl and mix thoroughly with a spoon to combine.
- Make the sauce: Combine all the ingredients for the sauce in a measuring cup or small bowl and whisk until fully combined.
- Prepare the fresh and dry ingredients: Chop the garlic, fresh red chilies, ginger, and the spring onion, and cut the dried red chilies in halves and thirds (depending on their length). Set everything aside until ready to use.
- Cook the linguini: Cook the linguini al–dente according to package directions in a large pot of salted water. Then drain and set aside once cooked. (I like to run water over my pasta to prevent them from sticking and cooking further.)
For the Kung Pao Chicken Linguini:
- Cook the chicken: Heat 1 TBLS peanut oil in a wok over medium-high heat. Once the oil is hot, add the chicken pieces and spread evenly in the wok. Cook for 1 minute without touching them. Then continuously stir-fry for another minute or until the chicken is brown on all sides. Use a slotted spoon to scoop the chicken into a strainer and allow excess oil to drip into the wok. Transfer the chicken to a clean bowl and set aside. Discard the any remaining juices and oil in the wok and wipe it out with paper towels. Set the wok back on the stove.
- Heat remaining peanut oil, sesame oil, and chili oil (if using) in the wok over medium-high heat. Once hot, add the spring onion whites, garlic, and ginger. Stir-fry for a 1-2 minutes or until fragrant.
- Add the dried red chilies, peanuts, and fresh red chilies to the wok. Stir-fry for another 1 minute.
- Add the chicken pieces and toss to combine with all the ingredients in the wok.
- Give the sauce in the measuring cup a quick stir with a spoon. Then add the linguini and pour the sauce over the noodles.
- Continuously stir-fry and toss to combine the sauce with the noodles and everything in the wok for 4-5 minutes, or until the sauce has thickened and the noodles are well coated with it. (Note: If the sauce thickens too much, feel free to add a tablespoon or water as needed to thin it out a little and continue tossing.) Then remove the wok from the heat.
- To Serve: Divide the Kung Pao Chicken Linguini in four plates or transfer to a serving dish. Garnish with the spring onion greens and serve.


Notes
- Make it vegetarian (or vegan): Instead of chicken, you can make this with a firm tofu block diced up into cubes. However, instead of marinating the tofu, I recommend pan-frying the cubes in salt and pepper until brown on all sides. Then just add it to the stir-fry when you would add the chicken back into the wok. While I find it unnecessary to coat the tofu cubes with cornstarch since they usually crisp up perfectly without it, you are most welcome to do so if you would like extra crispy tofu cubes. Also, you can add additional soy sauce to the sauce for the stir-fry if you feel it’s needed.
- Add veggies: I kept it simple and only used aromatics in this noodle stir-fry since traditional Kung Pao Chicken doesn’t have any veggies in it. But feel free to add any of your favorite stir-fry friendly veggies like bell peppers, snap peas, mushrooms, onion, carrots, etc.
- Make it gluten-free: Use Tamari or gluten-free soy sauce in place of the low sodium soy sauce. In addition, you should also use a gluten-free dark soy sauce, and either balsamic or white vinegar in place of the Chinkiang Vinegar. Last but not least, be sure to use gluten-free pasta (or noodles).
- Swap the protein: Feel free to swap the chicken for beef, pork, or shrimp. My personal favorite is the shrimp version (after this chicken one of course)!
- Swap the noodles/pasta: Fettuccine, bucatini, spaghetti, udon, egg noodles, Hokkien noodles are all great options this stir-fry.
Nutrition
- Serving Size: 1 plate
- Calories: 667
- Sugar: 22.6g
- Sodium: 1501.6mg
- Fat: 23.9g
- Saturated Fat: 3.8g
- Unsaturated Fat: 17.2g
- Trans Fat: 0g
- Carbohydrates: 74.7g
- Fiber: 5.6g
- Protein: 39g
- Cholesterol: 73mg
This post may contain affiliate links. We are a part of the Amazon Services LLC Associates Program, an affiliate advertising program designed to provide a means for us to earn a small commission (at no extra cost to you) by linking to Amazon.com and affiliated sites. The nutritional information provided is approximate and can vary based on several factors. It should only be used as a general guideline. For more information, please see our Disclosure.


Thanks! Hope you enjoy it!
Wow, this looks really delicious! Can’t wait to try it. 👌