Easy Air Fryer Chicken Breast (Juicy and Tender!)
This post contains affiliate links.
Learn how to cook tender, perfectly seasoned, juicy Air Fryer Chicken Breasts with a fuss-free easy method that works every time! You can serve them as a main with cooked veggies and potatoes. Or slice, cube, or shred them and use for meal prep!

Looking for more air fryer recipes? Try my Air Fryer Sweet Potato Wedges, this Air Fryer Baked Oats, or this Healthy Air Fryer Granola next!
About This Recipe
The internet has several thousands of recipes for the perfect and best Air Fryer Chicken Breast.
How is this recipe different or better you ask? It works, is quick, tastes great and doesn’t require multiple steps.
While you can go through extra steps like brining and pounding the chicken breasts with a meat mallet for even thickness, this recipe does not require them. It is geared towards those who want juicy chicken breasts quickly and without extra fuss.
I’ve been using this method for more than 2 years now and it works perfectly every time for my weekly lunch meal prep.
If you’re in need of a simple and quick air fryer chicken breast recipe, give this one a try. It’s easy, speedy and made with simple ingredients.
Most importantly, it yields delicious, juicy and tender chicken breasts every single time!
If you don’t have an air fryer, try my Juicy Baked Chicken Breasts recipe instead!
Table of contents
Why This Recipe Works
- Quick and easy. It’s like making baked chicken breasts but quicker and without heating up the entire kitchen. Bonus during hot summer months!
- Fuss free. Dry brining, brining, or pounding the chicken breasts with a meat mallet is NOT required.
- Customizable. You can use my go to classic seasoning blend, a store-bought or homemade seasoning blend with all your favorite herbs and spices.
- Meal prep friendly. Chicken is a great source of lean protein and fantastic for meal prep. You can slice, shred or dice the chicken to use in easy lunches or dinners during the week.
- Four words. JUICY TENDER CHICKEN BREASTS!!

Ingredient Notes and Substitutes

- Chicken Breasts: You’ll need two boneless skinless chicken breasts, roughly 7-8 ounces (200-226 grams) each.
- Kosher Salt and Black Pepper: To season the chicken. If using table salt, use a little less than half the amount specified. Freshly cracked black pepper tastes best if you have a pepper grinder. Otherwise, coarse ground black pepper will work just fine.
- Garlic Powder: For a hint of savory garlic flavor.
- Smoked Paprika: I love La Chinata hot smoked paprika but you can use a regular or sweet smoked paprika for a mild flavor.
- Olive Oil Cooking Spray: Ensures the chicken doesn’t stick to the air fryer basket. Avocado oil spray, coconut oil spray, grapeseed oil spray or canola oil spray are other good options. You can also just use olive oil, avocado oil or any of the aforementioned oils mentioned. Avoid cooking spray with propellant such as PAM or similar as they can damage the nonstick coating of your air fryer basket.
Full ingredient amounts are in the recipe card below.
Keep in Touch!
Subscribe to get new posts via email:
How to Make Juicy Air Fryer Chicken Breasts
Below is a step-by-step overview on how to make this recipe. Keep scrolling down to get to the recipe card below with the full recipe and detailed instructions.

In a large bowl, combine the kosher salt, black pepper, garlic powder and smoked paprika. Mix until evenly combined.


3. Place chicken in the air fryer. Place the seasoned chicken breasts (plump/smooth side down) in the center of the basket.


Serving Suggestions
- Dinner as a main. Serve with roasted or air fryer veggies and some potatoes or rice on the side. Air fryer asparagus, green beans, broccoli are all tasty options.
- Use in fried rice. Or any recipe that calls for cooked chicken! Try my Spicy Chicken Enchilada Soup, Smoky Harissa Mac and Cheese, or make a high protein chicken pizza with my Greek Yogurt Pizza Dough recipe!
- In sandwiches, wraps, bowls. I make a toasted sourdough bagel sandwich with air fryer chicken breast slices, a slice of melted provolone cheese, and Hot Perinaise (spicy peri peri mayonnaise from Nando’s) for lunch several days a week. It also tastes great in lunch wrap or rice bowl! It’s can also be used in this Mango Chicken Salad Sandwich, Coronation Chicken Salad, and Spicy Asian-Cajun Chicken Salad.
- Toss in salads. Great for a quick and simple light lunch or dinner!

Storing and Reheating Leftover Air Fryer Chicken
- Storing. Store leftovers in an airtight container in the fridge for up to 4-5 days.
- To Freeze. Freeze in individual and portioned storage containers or Ziplock bags for up to 3 months. Thaw overnight in the fridge.
- Reheating. Reheat in the microwave on high for 30-60 seconds (depending on the portion size). You can also reheat in the air fryer for 2-3 minutes at 375°F/190°C.
Cook’s Tips
- Don’t overcrowd the basket. Make sure the chicken breasts are not touching each other or the sides of the basket so that there is enough room for the hot air to circulate.
- Use a meat thermometer. Using a meat thermometer (instant-read thermometer) is the best way to check the internal temperature of the chicken breasts to make sure they are cooked through. While you can slice to check if the juices run clear, it can cause the juices to spill out and lead to dryer chicken meat. I love my ThermoWorks Thermapen ONE instant-read thermometer and use it every time I make this air fryer chicken breast recipe. However, if you don’t have a meat thermometer, the next best way to check for doneness is to slice with a knife and ensure the juices are not red or cloudy.
- Adjust cook time based on chicken breast size. Larger chicken breasts will take longer to cook in an air fryer. Smaller chicken breasts will cook more quickly. Keep in mind that the amount of time it takes to cook chicken in an air fryer will also vary across different air fryer models and brands. Below are approximate cooking times for various sized chicken breasts that have not been pounded with a meat mallet to even thickness.
- Small breasts (5-7 ounces/142-200 grams): 12-18 minutes.
- Medium breasts (8-10 ounces/226-283 grams): 18-20 minutes.
- Large breasts (11 ounces or more/312 grams): 20-22 minutes.
Variations
You can vary the flavor by adding different herbs and seasonings. Below are some ideas!
- Add herbs. I sometimes add ½ teaspoon of Italian seasoning, Herbs de Provence, or dried oregano to my go-to spice mix for chicken breasts (kosher salt, black pepper, garlic powder and smoked paprika).
- Make it spicy! Add ¼ teaspoon ground cayenne to the seasoning mix for spicy chicken!
- Mexican style. Use ¼ teaspoon each ground cumin, ground coriander, chipotle chili powder or regular chili powder, ½ teaspoon garlic powder, ½ teaspoon onion powder, ½ teaspoon Mexican dried oregano (or regular dried oregano), ¾ teaspoon smoked paprika, 1-2 teaspoons brown sugar, and 1 tablespoon freshly squeezed lime juice.
- Use a store-bought seasoning blend. I sometimes use Old El Paso Smoky BBQ Fajita Seasoning Mix or their spicy chicken fajita mix!

FAQs
Chicken is safe to eat at 165°F/74°C. However, you can cook to 160°F/71°C as the internal temperature of the chicken breasts will naturally rise about 5°F through carryover cooking while the chicken is resting.
While brining (placing the chicken in a salt water solution for a few minutes before rinsing and seasoning) can result in more flavorful and tender meat because it helps dissolve the meat fibers, it is not absolutely necessary. I skip this step and still yield great tasting and juicy chicken breasts after cooking in the air fryer. If you have a few extra minutes, you can dry brine the chicken. Simply season the chicken breasts with the kosher salt and place in the fridge for 10-15 minutes. Then add the other seasonings and air fry as per instructions.
No, it’s not absolutely necessary if you are in a hurry and if your chicken breasts are smaller in size. However, I do recommend it for larger sized chicken breasts that are above 8 ounces (226 grams). Pounding the thicker end of the breasts at the top until the chicken is about half an inch thick throughout can promote even cooking. It will also prevent you from ending up with juicy, perfectly cooked tops, with dried-out and tough overcooked chicken at the bottom/tip end. If you do need to pound the thicker top end, place your chicken breasts in between of plastic wrap and then pound with a meat mallet.
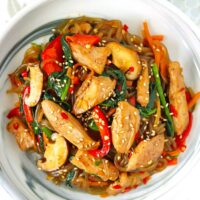
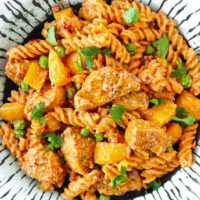
Spray the air fryer basket lightly with cooking oil spray and preheat the air fryer at 190°C/375°F for 3 minutes (or according to manufacturer’s instructions). Dice chicken into 1-inch bite-sized pieces and toss with seasonings in a bowl until evenly coated. Place the chicken pieces in the air fryer in single layer. Air fry for 6-7 minutes, shaking the basket halfway through. I recommend air frying in batches of 7 to 10.6 ounces/200 to 300 grams so that you don’t overcrowd the basket. Check out my Spicy Peanut Soba Noodles with Chicken and Creamy Lemon Chicken Orzo for which I made and used air fryer chicken pieces.
This recipe should work with frozen chicken breasts. However, you will need to air fry for a few minutes longer – about 24-30 minutes depending on size. It’s also preferable to use smaller sized frozen chicken breasts. A longer cook time could ultimately lead to dryer chicken meat on the inside and overcooked outside, especially if they are large sized chicken breasts. Therefore, I recommend and personally prefer cooking thawed or fresh chicken breasts in the air fryer. The one or two times that I tried to air fry partially frozen chicken breasts (they didn’t thaw fully in time), the chicken was unevenly cooked and also dry and hard in some parts after cooking.
Sure! You can use this recipe as a base the first time and adjust the cook time and temperature if needed the next time. Since different air fryer models run differently, you may find a shorter cook time and higher temperature works better in your particular air fryer. Air frying at 400°F/200°C for 16 minutes, turning halfway through, may work better in the Powel XL air fryer. However, I don’t have that model so cannot confirm times and temperature for it.
MADE THIS RECIPE? Please leave a comment and a ⭐️⭐️⭐️⭐️⭐️ star rating below and let me know how you liked it! You can also take a photo and tag it with @thatspicychick on Instagram and hashtag it #thatspicychick. I love seeing your creations!
STAY CONNECTED! You can also follow me on Pinterest, Facebook or Instagram.
Sign up for my email list to get my latest recipe in your inbox weekly!
More Air Fryer Recipes


Easy Air Fryer Chicken Breast (Juicy and Tender!)

Learn how to cook tender, perfectly seasoned, juicy Air Fryer Chicken Breasts with a fuss-free easy method that works every time! You can serve them as a main with cooked veggies and potatoes. Or slice, cube, or shred them and use for meal prep!
- Prep Time: 3
- Cook Time: 17
- Total Time: 20 minutes
- Yield: 3 Servings 1x
- Category: Main Course
- Method: Air Fry
- Cuisine: American
- Diet: Gluten Free
Ingredients
- 14 ounces – 1 pound (two 7–8 ounce) / 400-454 grams boneless skinless Chicken Breasts
- ¾ teaspoon Kosher Salt
- ¾ teaspoon freshly cracked Black Pepper
- ¾ teaspoon Garlic Powder
- ¾ teaspoon Smoked Paprika (hot or sweet)
- 2 sprays / 1ml Olive Oil Cooking Spray (or use ½–1 teaspoon olive oil or avocado oil)
Instructions
- Preheat the air fryer: Lightly spray the air fryer basket with the olive oil cooking spray. Preheat your air fryer at 375°F/190°C for 3 minutes (or according to manufacturer’s instructions).
- Make the seasoning blend: In a large bowl, combine the kosher salt, black pepper, garlic powder and smoked paprika. Mix until evenly combined
- Season the chicken breasts: Pat-dry the chicken breasts and trim off any excess fat if needed. Place the chicken in the bowl with the seasonings blend and use tongs to turn and evenly coat both sides of the chicken.
- Air fry: Place the chicken breasts (plump/smooth side down) in the center of the basket, making sure they don’t touch each other or the sides of the basket so that there is enough room for the hot air to circulate. Air fry for 9 minutes, then remove the air fryer basket and use tongs to carefully flip the chicken over so that the smooth side is facing up. Place the basket back into the air fryer and continue cooking for 8-9 minutes or until the internal temperature of the thickest part of the chicken breast registers at least 160°F/71°C on a meat thermometer. (Chicken is safe to eat at 165°F/74°C but the temperature will naturally rise about 5°F through carryover cooking while the chicken is resting. See note 4. I personally like to cook my chicken to 170°F/76°C as prefer it to have a firmer exterior but still be juicy and tender on the inside)
- Cool: Use tongs to transfer the chicken to a cutting board and allow to rest for 10 minutes to lock in all the juices.
- Slice: Use a sharp knife to cut the chicken into thin slices (as pictured) and serve! Or dice or shred to use in other recipes like chicken salads, wraps, sandwiches, soups, pasta, etc.


Notes
- Brining. While brining (placing the chicken in a salt water solution for a few minutes before rinsing and seasoning) can result in more flavorful and tender meat because it helps dissolve the meat fibers, it is not absolutely necessary. I skip this step and still yield great tasting and juicy chicken breasts after cooking in the air fryer. If you have a few extra minutes, you can dry brine the chicken. Simply season the chicken breasts with the kosher salt and place in the fridge for 10-15 minutes. Then add the other seasonings and air fry as per instructions.
- Do you need to pound the chicken breasts with a meat mallet? No, it’s not absolutely necessary if you are in a hurry and if your chicken breasts are smaller in size. However, I do recommend it for larger sized chicken breasts that are above 8 ounces (226 grams). Pounding the thicker end of the breasts at the top until the chicken is about half an inch thick throughout can promote even cooking. It will also prevent you from ending up with juicy, perfectly cooked tops, with dried-out and tough overcooked chicken at the bottom/tip end. If you do need to pound the thicker top end, place your chicken breasts in between of plastic wrap and then pound with a meat mallet.
- Adjust cook time based on the size of your chicken breasts. Larger chicken breasts will take longer to cook in an air fryer. Smaller chicken breasts will cook more quickly. Keep in mind that the amount of time it takes to cook chicken in an air fryer will also vary across different air fryer models and brands. Below are approximate cooking times for various sized chicken breasts that have not been pounded with a meat mallet to even thickness.
- Small breasts (5-7 ounces/142-200 grams): 12-18 minutes.
- Medium breasts (8-10 ounces/226-283 grams): 18-20 minutes.
- Large breasts (11 ounces or more/312 grams): 20-22 minutes.
- Use a meat thermometer. Using a meat thermometer (instant read thermometer) is the best way to check the internal temperature of the chicken breasts to make sure they are cooked through. Chicken is safe to eat at 165°F/74°C. However, you can cook to 160°F/71°C as the internal temperature of the chicken breasts will naturally rise about 5°F through carryover cooking while the chicken is resting. While you can slice to check if the juices run clear, it can cause the juices to spill out and lead to dryer chicken meat. If you don’t have a meat thermometer, the next best way to check for doneness is to slice with a knife and ensure the juices are not red or cloudy.
- Storing and reheating:
- Storing: Store leftovers in an airtight container in the fridge for up to 4-5 days.
- To Freeze: Freeze in individual and portioned storage containers or Ziplock bags for up to 3 months. Thaw overnight in the fridge.
- Reheating: Reheat in the microwave on high for 30-60 seconds (depending on the portion size). You can also reheat in the air fryer for 2-3 minutes at 375°F/190°C.
- Nutritional information is calculated based on using 14 ounces (two 7 ounce)/400 grams boneless skinless chicken breasts.
Nutrition
- Serving Size: 1/3 of recipe
- Calories: 169
- Sugar: 0.1g
- Sodium: 371.9mg
- Fat: 3.9g
- Saturated Fat: 0.8g
- Unsaturated Fat: 3.1
- Trans Fat: 0g
- Carbohydrates: 1.1g
- Fiber: 0.2g
- Protein: 30.3g
- Cholesterol: 97.3mg
This post may contain affiliate links. We are a part of the Amazon Services LLC Associates Program, an affiliate advertising program designed to provide a means for us to earn a small commission (at no extra cost to you) by linking to Amazon.com and affiliated sites. The nutritional information provided is approximate and can vary based on several factors. It should only be used as a general guideline. For more information, please see our Disclosure.